本教程以 tiny-yolov3 模型为例,介绍如何在边缘智能创建自定义推理模型,并在边缘智能节点(一体机)上部署相应的模型服务。此外,本教程提供了一份示例代码,可用于验证模型服务是否正常工作。
准备工作
在边缘智能创建自定义模型前,您需要准备好模型文件及相关的配置信息。
下载模型文件。
通过 GitHub 获取所需的模型文件。访问 tiny-yolov3-11.onnx 模型页面,然后单击下载图标,下载模型文件。调整文件结构。
边缘智能对模型文件的文件结构有特定要求,因此在下载模型文件后,您需要按照要求调整文件的结构。- 创建一个新文件夹,将它命名为
1。 - 将下载的模型文件
tiny-yolov3-11.onnx重命名为model.onnx,然后将它移动到文件夹1。
完成上述操作后,文件夹1就成为符合边缘智能要求的模型文件。
- 创建一个新文件夹,将它命名为
获取模型的输入和输出属性。
创建自定义模型时,您需要提供模型的输入和输出配置。您可以通过以下方式获取所需信息:阅读模型的文档,从文档中获取输入和输出属性。

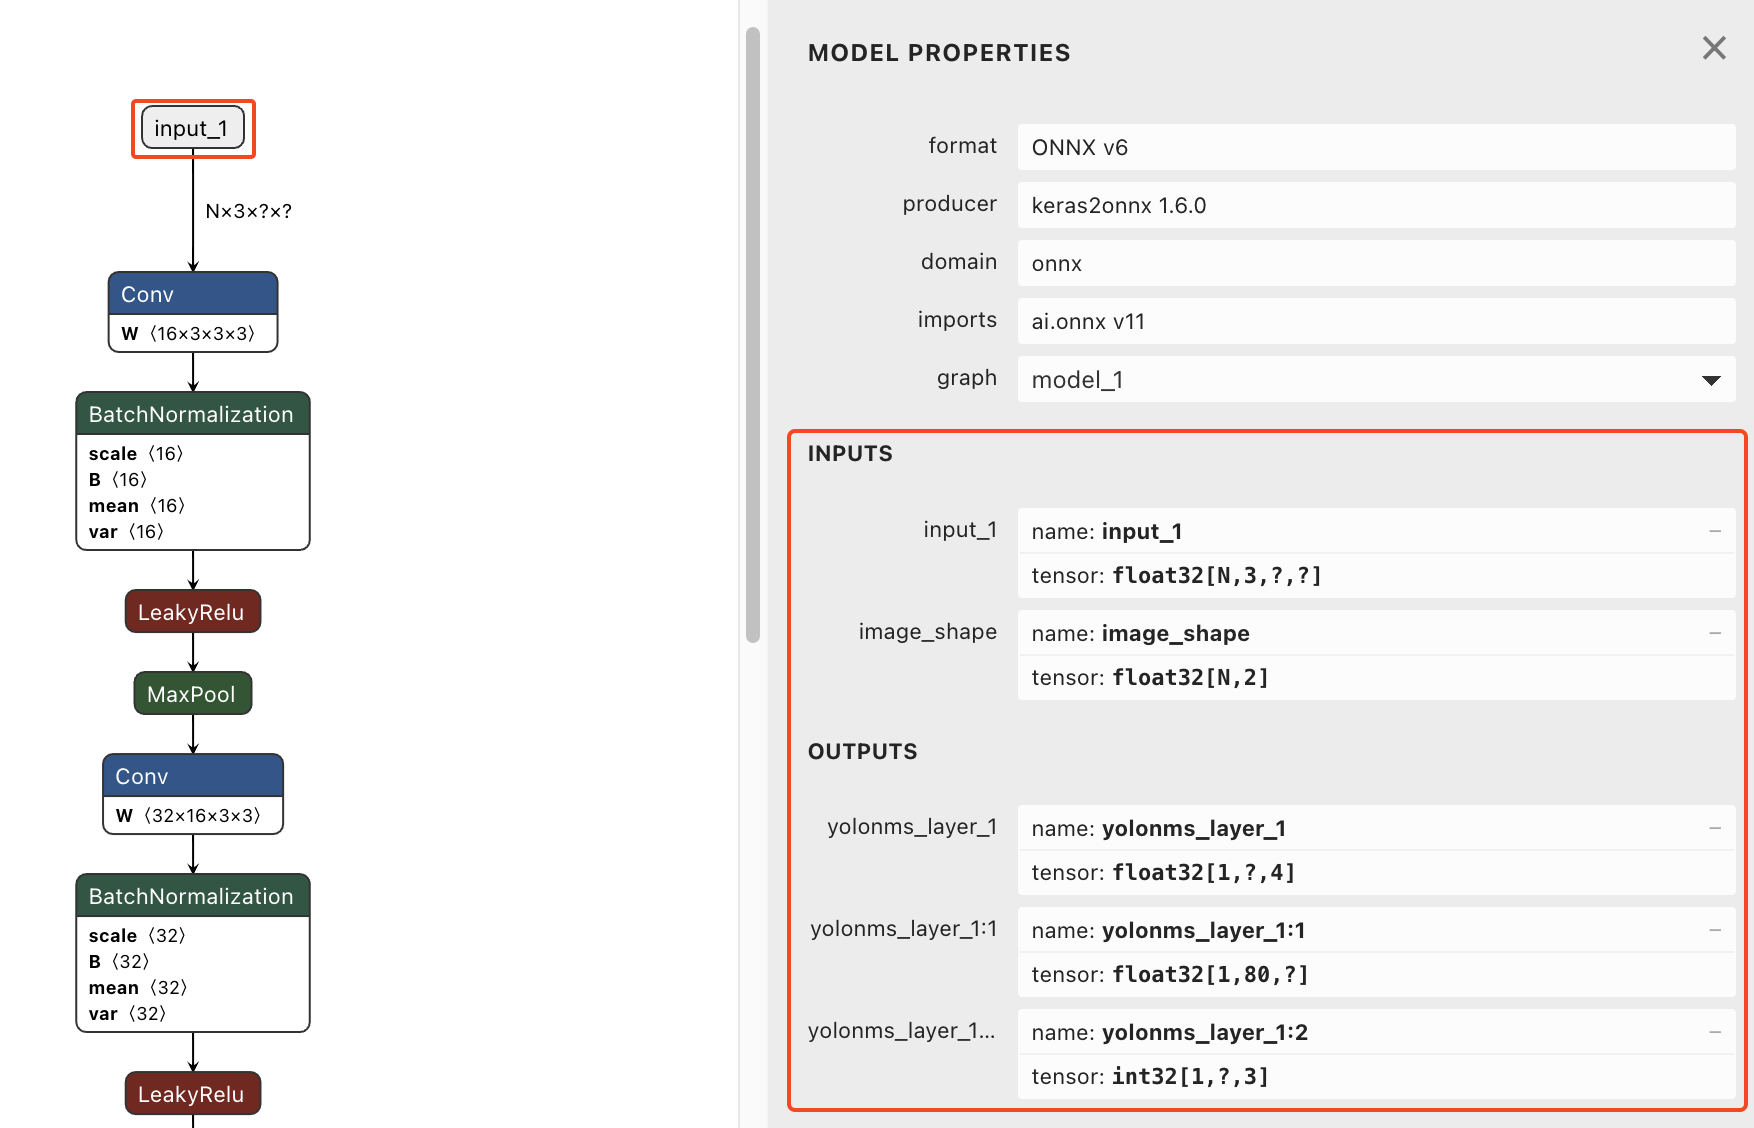
(推荐)使用 Netron 工具解析模型的结构,自动获取输入和输出属性。本文文末提供了 Netron 工具的使用说明,供您参考。
tiny-yolov3 模型的输入和输出属性说明如下:输入(INPUTS)
参数
属性
释义
input_1
Tensor 形状:
[1, 3, 416, 416]float321表示批处理大小(batch size);3表示 RGB 颜色通道;416 * 416表示图片的高和宽。
image_shape
Tensor 形状:
[1, 2]float321表示批处理大小;2表示原始图片的大小(size)。
输出(OUTPUTS)
参数
属性
释义
yolonms_layer_1
Tensor 形状:
[1, -1, 4]float321表示批处理大小;-1是不定长度,实际长度为 2535,表示边界框(bounding box)的个数;4表示边界框的坐标值,4 个数值的含义分别为:top,left,buttom,right。
yolonms_layer_1:1
Tensor 形状:
[1, 80, -1]float321表示批处理大小;80表示种类的个数,详情参见coco_classes;-1是不定长度,实际长度为 2535,在这里表示边界框的总个数;- 最后一个值为每个种类对应的边界框的分数。
yolonms_layer_1:2
Tensor 形状:
[1, -1, 3]int321表示批处理大小;-1是不定长度,表示有效的边界框的数量;3表示有效的边界框的索引(index),3 个数值的含义分别为批处理大小,类别和边界框的索引。
注意
- 该模型只支持一次处理一张图片,即批处理大小(batch size)必须是 1。
- 该模型基于CoCo 数据集,总共支持 80 个种类。
创建自定义模型
本章节介绍了在边缘智能控制台创建一个自定义模型,并将该模型部署到边缘智能节点的方法。
前提条件
- 您已经在边缘智能控制台创建了空间,并为空间绑定了节点。相关操作,请参见绑定节点。
- 您的边缘智能节点具有 GPU 组件。
操作步骤
登录边缘智能控制台。
在左侧导航栏,从 我的空间 下拉列表选择一个空间。
- 在左侧导航栏,选择 边缘推理 > 模型管理。
- 创建自定义模型。
- 在 自定义模型 标签页,单击 创建模型。
- 在 新建模型 页面,完成相关参数的设置,然后单击 确认。
- 名称:设置为 tiny-yolov3。
- 框架:选择 ONNX。
- 模型分类:选择 物体检测。
- 输入:根据模型的 INPUTS 属性进行设置。
- 输出:根据模型的 OUTPUTS 属性进行设置。
完成创建后,您将获得一个自定义模型。
- 为自定义模型创建一个版本。
- 单击 版本管理 页签。
- 单击 新建版本。
- 在 新建版本 对话框,完成相关操作的设置。
- 名称:设置为 1.0。
- 文件:单击添加图标,然后选择模型文件夹1。这时,系统会上传文件夹 1 中的文件。
- 其他参数的值无需修改。
- 等待模型文件上传成功后,单击 完成。
- 发布版本。
- 找到刚刚创建的版本,单击 操作 列的 发布。
- 在 提示 对话框,单击 确认发布。
- 部署模型服务。
- 找到刚刚创建的版本,单击 操作 列的 部署。
- 在 部署模型服务 页面,完成相关参数的设置,然后单击 确认。
- 节点:选择有 GPU 组件的节点(一体机)。
- 服务名称:设置为 tiny-yolov3-service。
- 最大批处理大小:设置为 0。
说明
由于模型的批处理大小固定为 1,因此最大批处理大小必须设置为 0,表示不允许推理服务动态调整批处理大小。
- HTTP端口:指定为节点上的一个空闲端口。 示例:30022。
- GRPC端口:指定为节点上的一个空闲端口。示例:30023。
- 其他参数的值无需修改。
- 等待模型服务部署成功。
当模型服务的状态变为 运行中,表示模型服务部署成功。这时,单击模型服务的名称,可以访问模型详情。在 基本信息 标签页,获取模型服务的 服务地址 和 模型ID。
模型调用
本章节提供了一份调用模型服务的示例代码。您可以使用示例代码来验证模型服务是否正常。
下载示例代码压缩包。
获取示例代码压缩包后,对压缩包进行解压缩。
tar -xzvf  poetry_tiny_yolov3_client.tar.gz
cd yolov3_client/
解压缩后,您将获得示例代码文件。
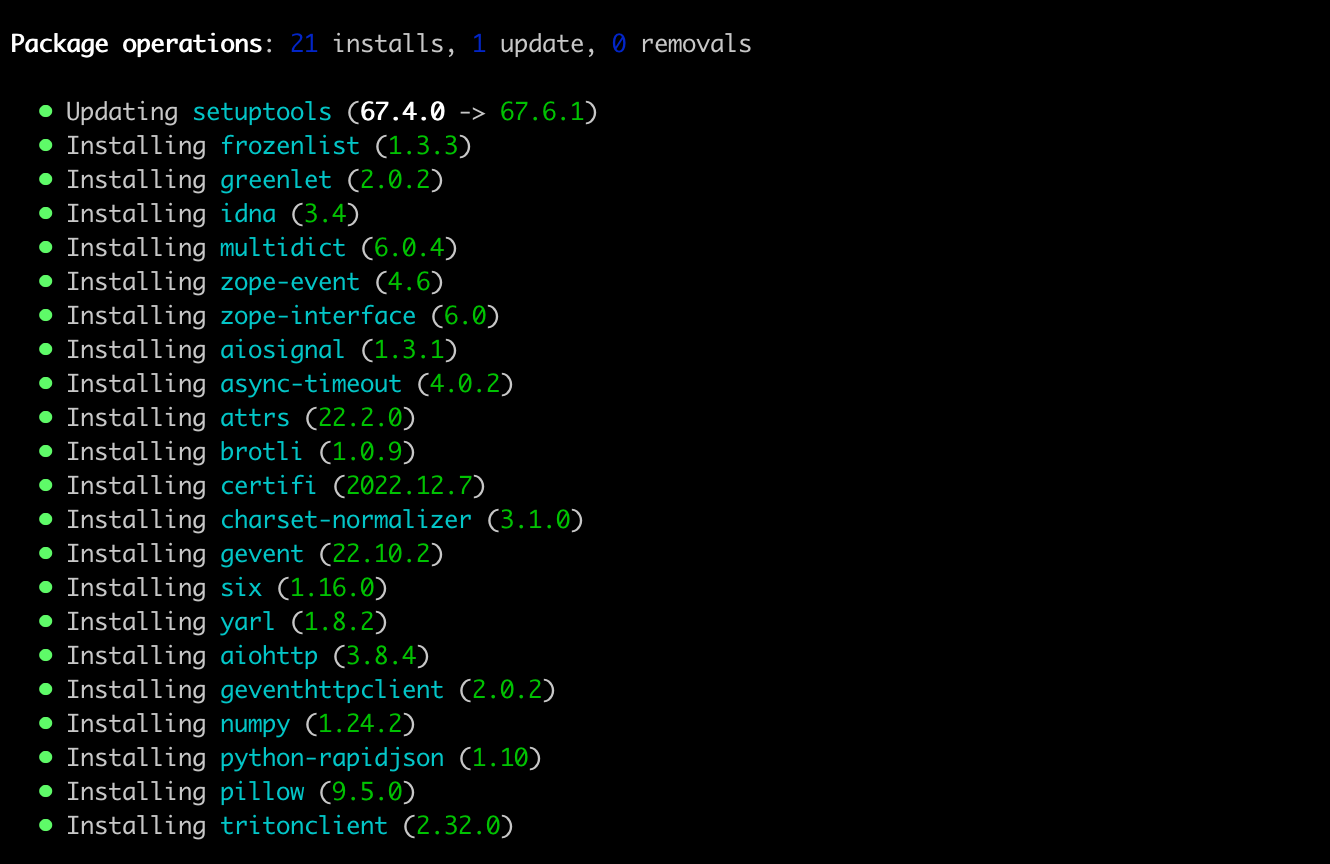
安装示例代码。
说明
安装示例代码前,确保您使用的 Python 版本不低于 3.8。本教程所使用的 Python 版本是 3.9.6。

示例代码支持以下两种安装方式:
(推荐)通过
requirements.txt文件安装pip3 install -r requirements.txt
通过包管理工具 poetry 安装
安装 poetry。
curl -sSL https://install.python-poetry.org | python3 -安装依赖。
poetry install

安装完成后,您可以查看
images目录。该目录下有两张测试图片。
运行示例代码。
将下面命令中的--model_id和--server_url的值替换为模型服务的 模型ID 和 服务地址。poetry run python yolov3_client.py --model_id <模型ID> --server_url <服务地址 | ip:port> --image_dir ./images --label_file coco_classes.txt --result_dir ./result查看推理结果。

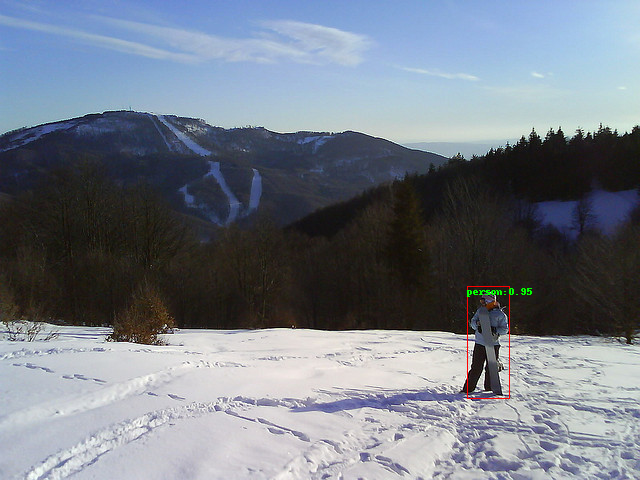
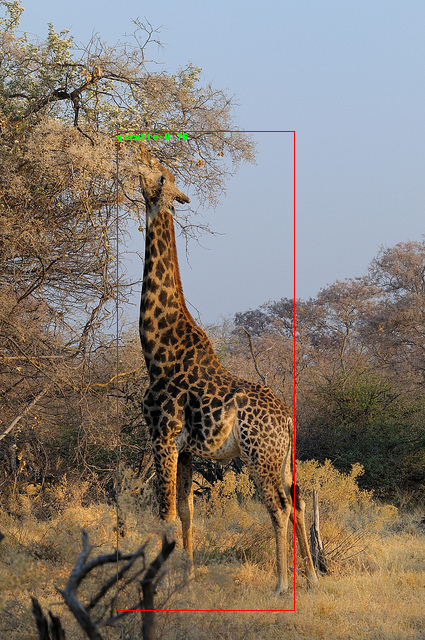
在
result目录下会看到图片输出。
输出的图片包含推理结果。


附录
使用 Netron 解析模型文件
- 访问 Netron 官网。
- 单击 Open Model,然后选择要解析的模型文件。
- 在模型处理流程图中,单击 input_1。
- 在页面右侧的 MODEL PROPERTIES 区域,查看模型的 INPUTS 和 OUTPUTS。

示例代码解读
以下是本教程所使用的示例代码的详细说明。示例代码包含以下处理逻辑:
1. 创建客户端(client)
triton_client = httpclient.InferenceServerClient(url=args.server_url)
2. 执行模型前处理
def letterbox_image(image, size):
    iw, ih = image.size
    w, h = size
    scale = min(w/iw, h/ih)
    nw = int(iw*scale)
    nh = int(ih*scale)

    image = image.resize((nw,nh), Image.BICUBIC)
    new_image = Image.new('RGB', size, (128,128,128))
    new_image.paste(image, ((w-nw)//2, (h-nh)//2))
    return new_image

def preprocess(img):
    model_image_size = (416, 416)
    boxed_image = letterbox_image(img, tuple(reversed(model_image_size)))
    image_data = np.array(boxed_image, dtype='float32')
    image_data /= 255.
    image_data = np.transpose(image_data, [2, 0, 1])
    return image_data

def pre_process_image(images, image_dir, process=False):
    image_list = []
    shape_list = []
    for name in images:
        path = os.path.join(image_dir, name)
        image = Image.open(path)
        image_shape = np.array([image.size[1], image.size[0]], dtype=np.float32)
        image = preprocess(image)
        image_list.append(image.astype(np.float32))
        shape_list.append(image_shape.astype(np.float32))

    image = np.stack(image_list, axis=0)
    image_shape = np.stack(shape_list, axis=0)
    return image, image_shape
模型的前处理用到以下 3 个函数:
letterbox_image(image, size)
这个函数的工作流程包括:- 获取图像的宽度、高度 (
iw, ih) 和目标尺寸 (w, h)。 - 计算缩放比例,保证新的宽度和高度 (
nw, nh) 不会超过目标尺寸。 - 使用双三次插值法 (
BICUBIC) 来调整图像的尺寸。 - 创建了一个新的图像 (
new_image)。这个图像的尺寸是目标尺寸,背景色是 RGB 中的(128,128,128)。 - 将调整尺寸后的原始图像粘贴到新图像的中心位置,并返回新图像。
- 获取图像的宽度、高度 (
preprocess(img)
这个函数的工作流程包括:- 设置模型的图像尺寸为
(416, 416)。 - 调用
letterbox_image函数将图像调整到模型的图像尺寸。 - 将调整尺寸后的图像转换为一个 NumPy 数组,并将其数据类型设置为
float32。 - 将数组中的所有值除以 255,以将像素值归一化到 0 到 1 的范围。
- 使用
np.transpose函数来重排数组的维度,将颜色通道维度从最后一个维度移动到第一个维度,并返回预处理后的图像数据。
图像数据包括:
images: 一个包含图像文件名的列表。image_dir: 图像文件的存储路径。process: 一个布尔参数,用于决定是否对图像进行预处理。
- 设置模型的图像尺寸为
pre_process_image(images, image_dir, process=False)
这个函数的工作流程包括:- 初始化两个空列表
image_list和shape_list,用于存储预处理过的图像和它们的形状。 - 遍历
images列表中的每个图像文件名,将每个文件名与image_dir进行拼接,形成完整的文件路径。 - 使用 PIL 的
Image.open函数打开图像文件,并获取图像的尺寸image.size。image.size返回的是一个元组,形式为(width, height)。因此,image.size[1]是图像的高度,image.size[0]是图像的宽度。Image.open函数将图像尺寸数组转换为np.float32类型,并存储在image_shape中。 - 调用之前定义的
preprocess函数,对图像进行预处理。 - 将预处理后的图像转换为
np.float32类型,并加入到image_list列表中。同样地,将image_shape加入到shape_list中。 - 使用
np.stack函数,沿着第一个轴(axis=0)堆叠image_list和shape_list中的所有元素,形成一个新的 Numpy 数组image和image_shape。 - 最后,返回
image和image_shape。
- 初始化两个空列表
3. 调用推理服务
request_images, request_shapes  = pre_process_image(images, image_dir)

        inputs = []
        inputs.append(httpclient.InferInput('input_1', request_images.shape, "FP32"))
        inputs.append(httpclient.InferInput('image_shape', request_shapes.shape, "FP32"))
        inputs[0].set_data_from_numpy(request_images, binary_data=False)
        inputs[1].set_data_from_numpy(request_shapes, binary_data=False)

        outputs = []
        outputs.append(httpclient.InferRequestedOutput('yolonms_layer_1:2', binary_data=False))
        outputs.append(httpclient.InferRequestedOutput('yolonms_layer_1:1', binary_data=False))
        outputs.append(httpclient.InferRequestedOutput('yolonms_layer_1', binary_data=False))

        results = triton_client.infer(args.model_id, inputs=inputs, outputs=outputs)
4. 执行模型后处理
def post_process_image(images, image_dir, results, result_dir, lables):
    indices = results.as_numpy("yolonms_layer_1:2")
    scores = results.as_numpy("yolonms_layer_1:1")
    boxes = results.as_numpy("yolonms_layer_1")

    out_boxes, out_scores, out_classes = [], [], []
    for idx_ in indices[0]:
        out_classes.append(idx_[1])
        out_scores.append(scores[tuple(idx_)])
        idx_1 = (idx_[0], idx_[2])
        out_boxes.append(boxes[idx_1])

    for index,image_name in enumerate(images):
        image_path = os.path.join(image_dir, image_name)
        image = Image.open(image_path)
        img = ImageDraw.Draw(image)
        x_size = image.size[0]
        y_size = image.size[1]
        x_ratio = x_size / 416
        y_ratio = y_size / 416

        for idx, box in enumerate(out_boxes):
            score = out_scores[idx]
            shape = [box[1], box[0], box[3], box[2]]
            img.rectangle(shape, outline ="red")

            lable = lables[int(out_classes[idx])]
            show_txt = f"{lable}:{score:.2}"
            print(show_txt, shape)
            img.text((box[1] , box[0] ), show_txt, fill=(0,255,0,255), align ="left")

        result_path = os.path.join(result_dir, f"{image_name[:-4]}_infer.png")
        image.save(result_path)
后处理过程包含以下逻辑:
- 从模型的输出中提取出边界框的索引、分数和坐标。
- 对于每一张输入图像,打开图像并准备绘制检测结果。
- 计算缩放因子。这是因为模型的输入通常会被缩放到一个固定的大小(在这个例子中是 416x416),而输出的坐标需要被转换回原始图像的大小。
- 对于每一个边界框,将其绘制在图像上,并附加上对应的类别标签和分数。
- 保存包含检测结果的图像。