导航
实时埋点检测
最近更新时间:2024.04.30 15:17:27首次发布时间:2024.04.30 15:17:27
1. 功能介绍
实时埋点检测是可以实时检测、快速验证埋点是否正确及数据上传情况的功能,常用于研发或测试人员debug验证,支持移动端App(Android、iOS)、微信小程序、网页端、服务端(Java)。 当使用埋点检测功能,成功建立埋点检测连接后,进入埋点验证页面,每一次事件触发都会实时显示在埋点验证的页面内。
2. 使用说明
2.1 功能入口
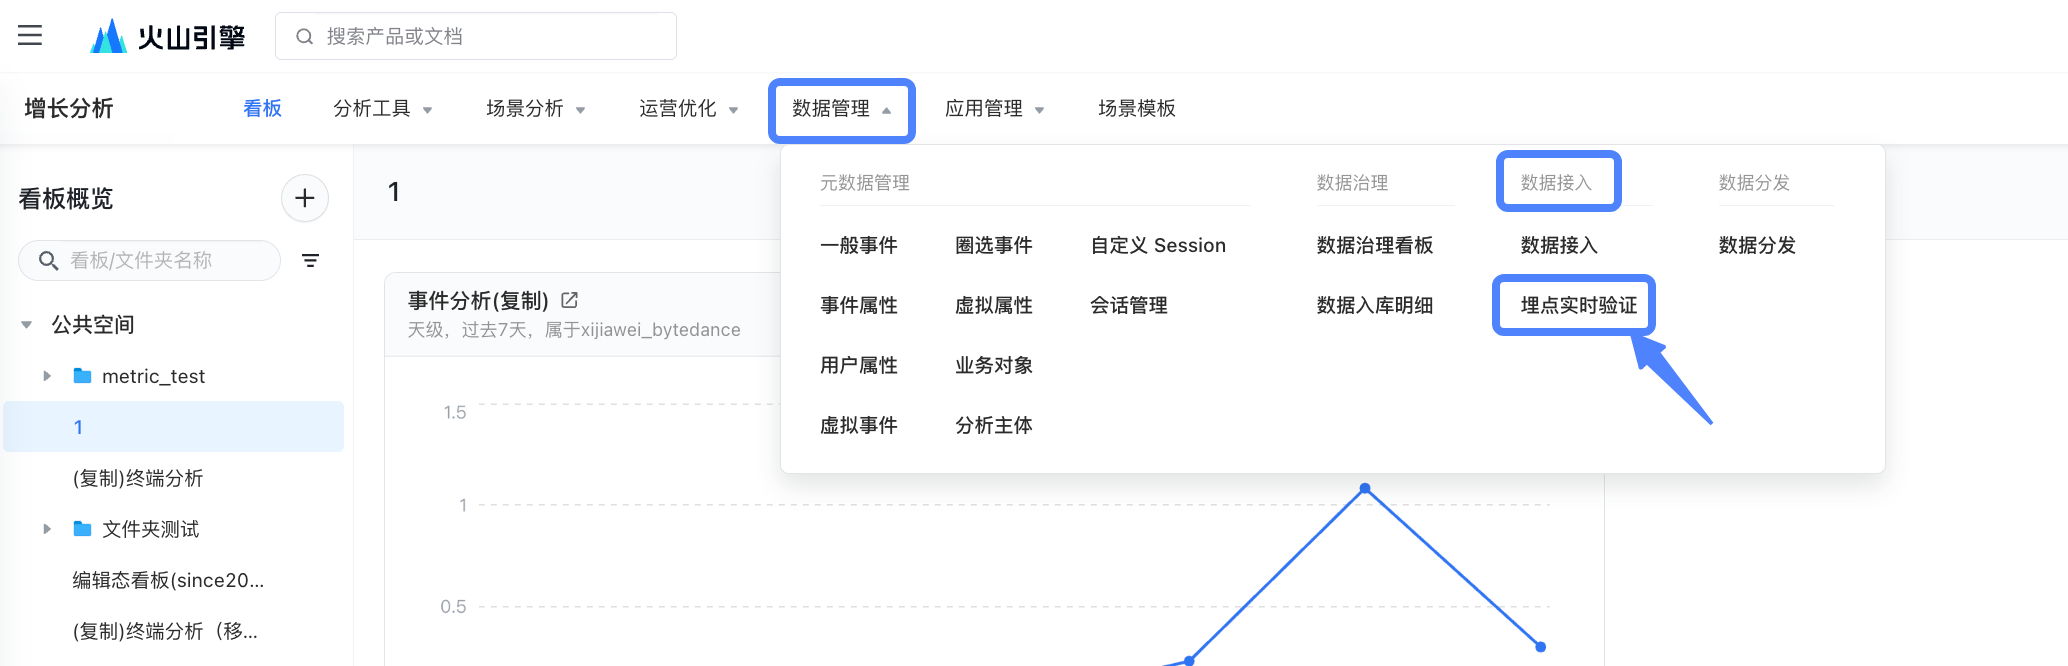
- 入口1:进入"数据管理-数据接入-埋点实时验证"页面。
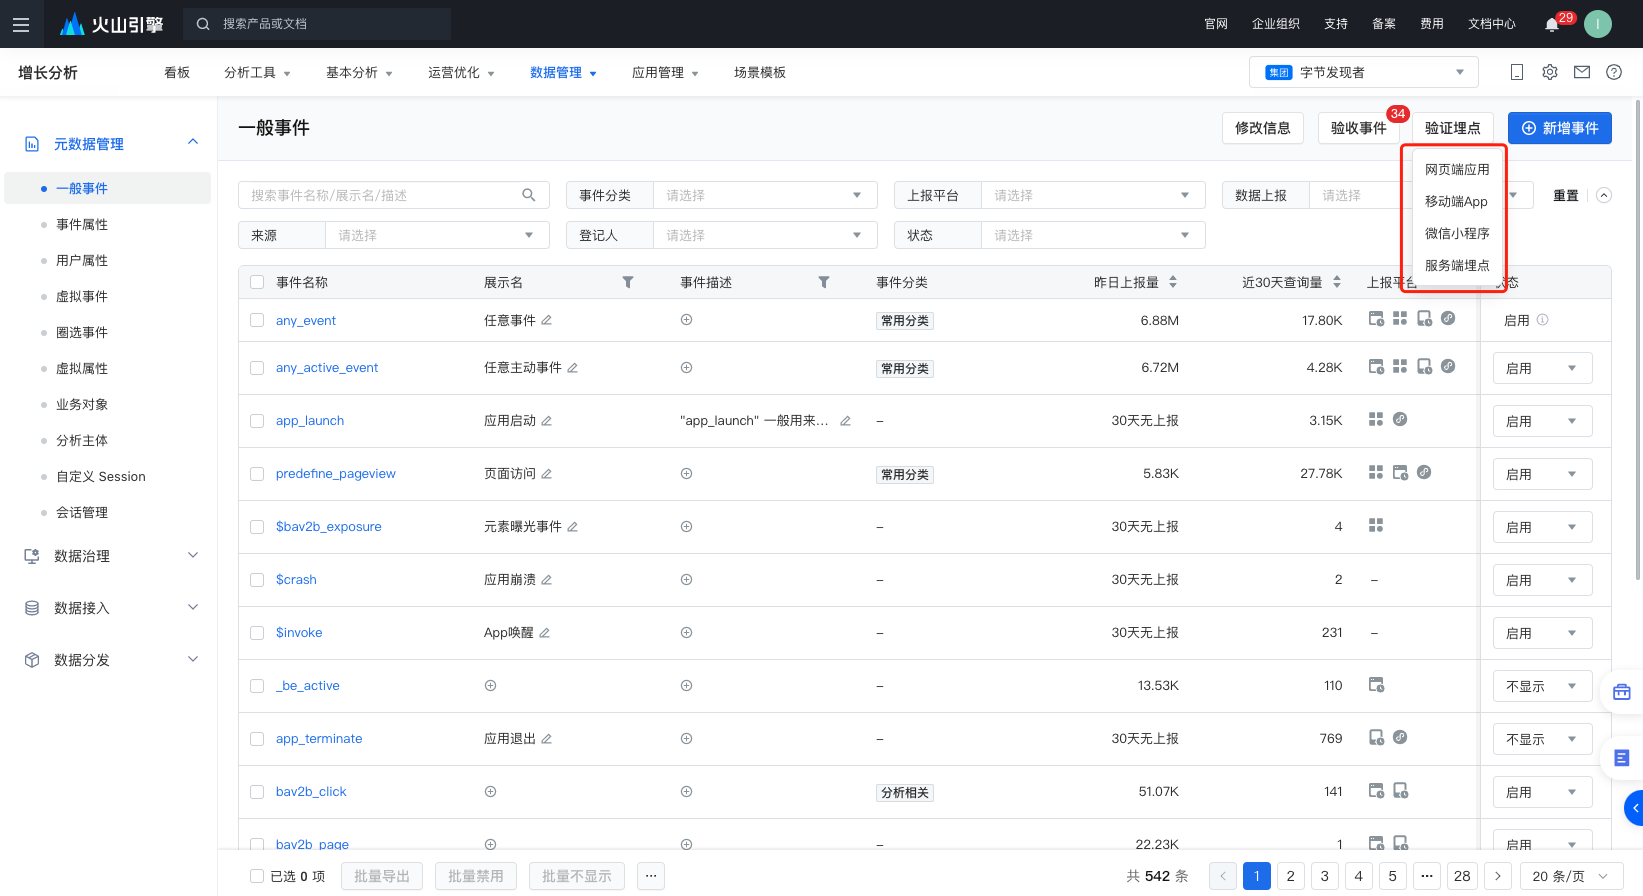
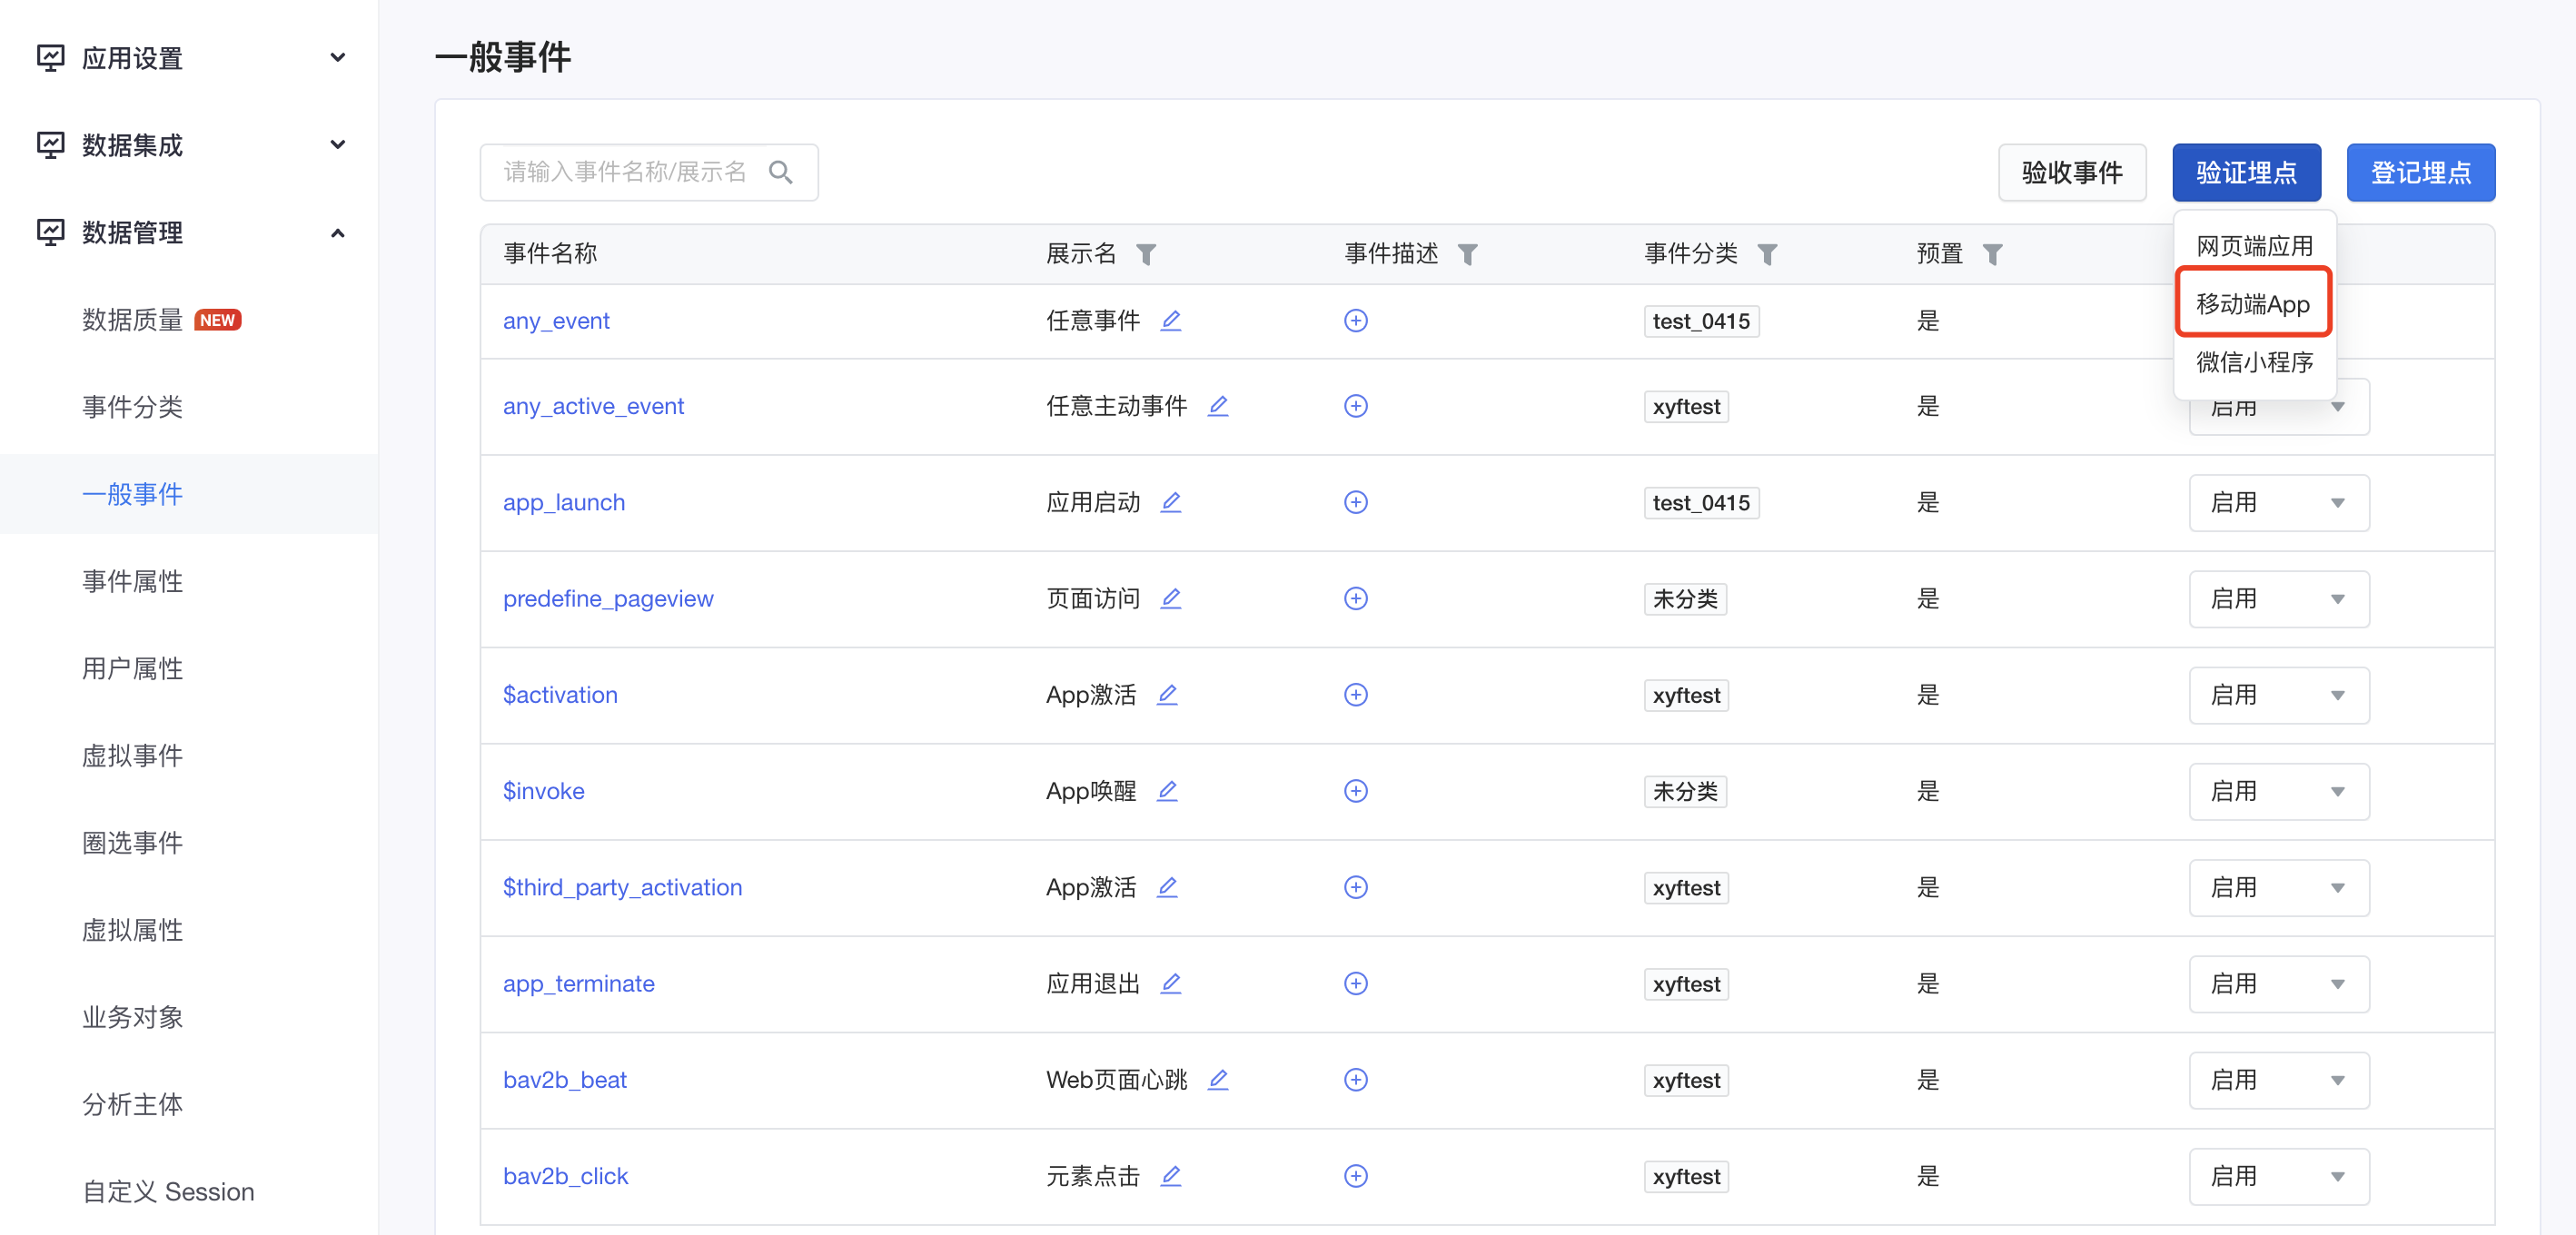
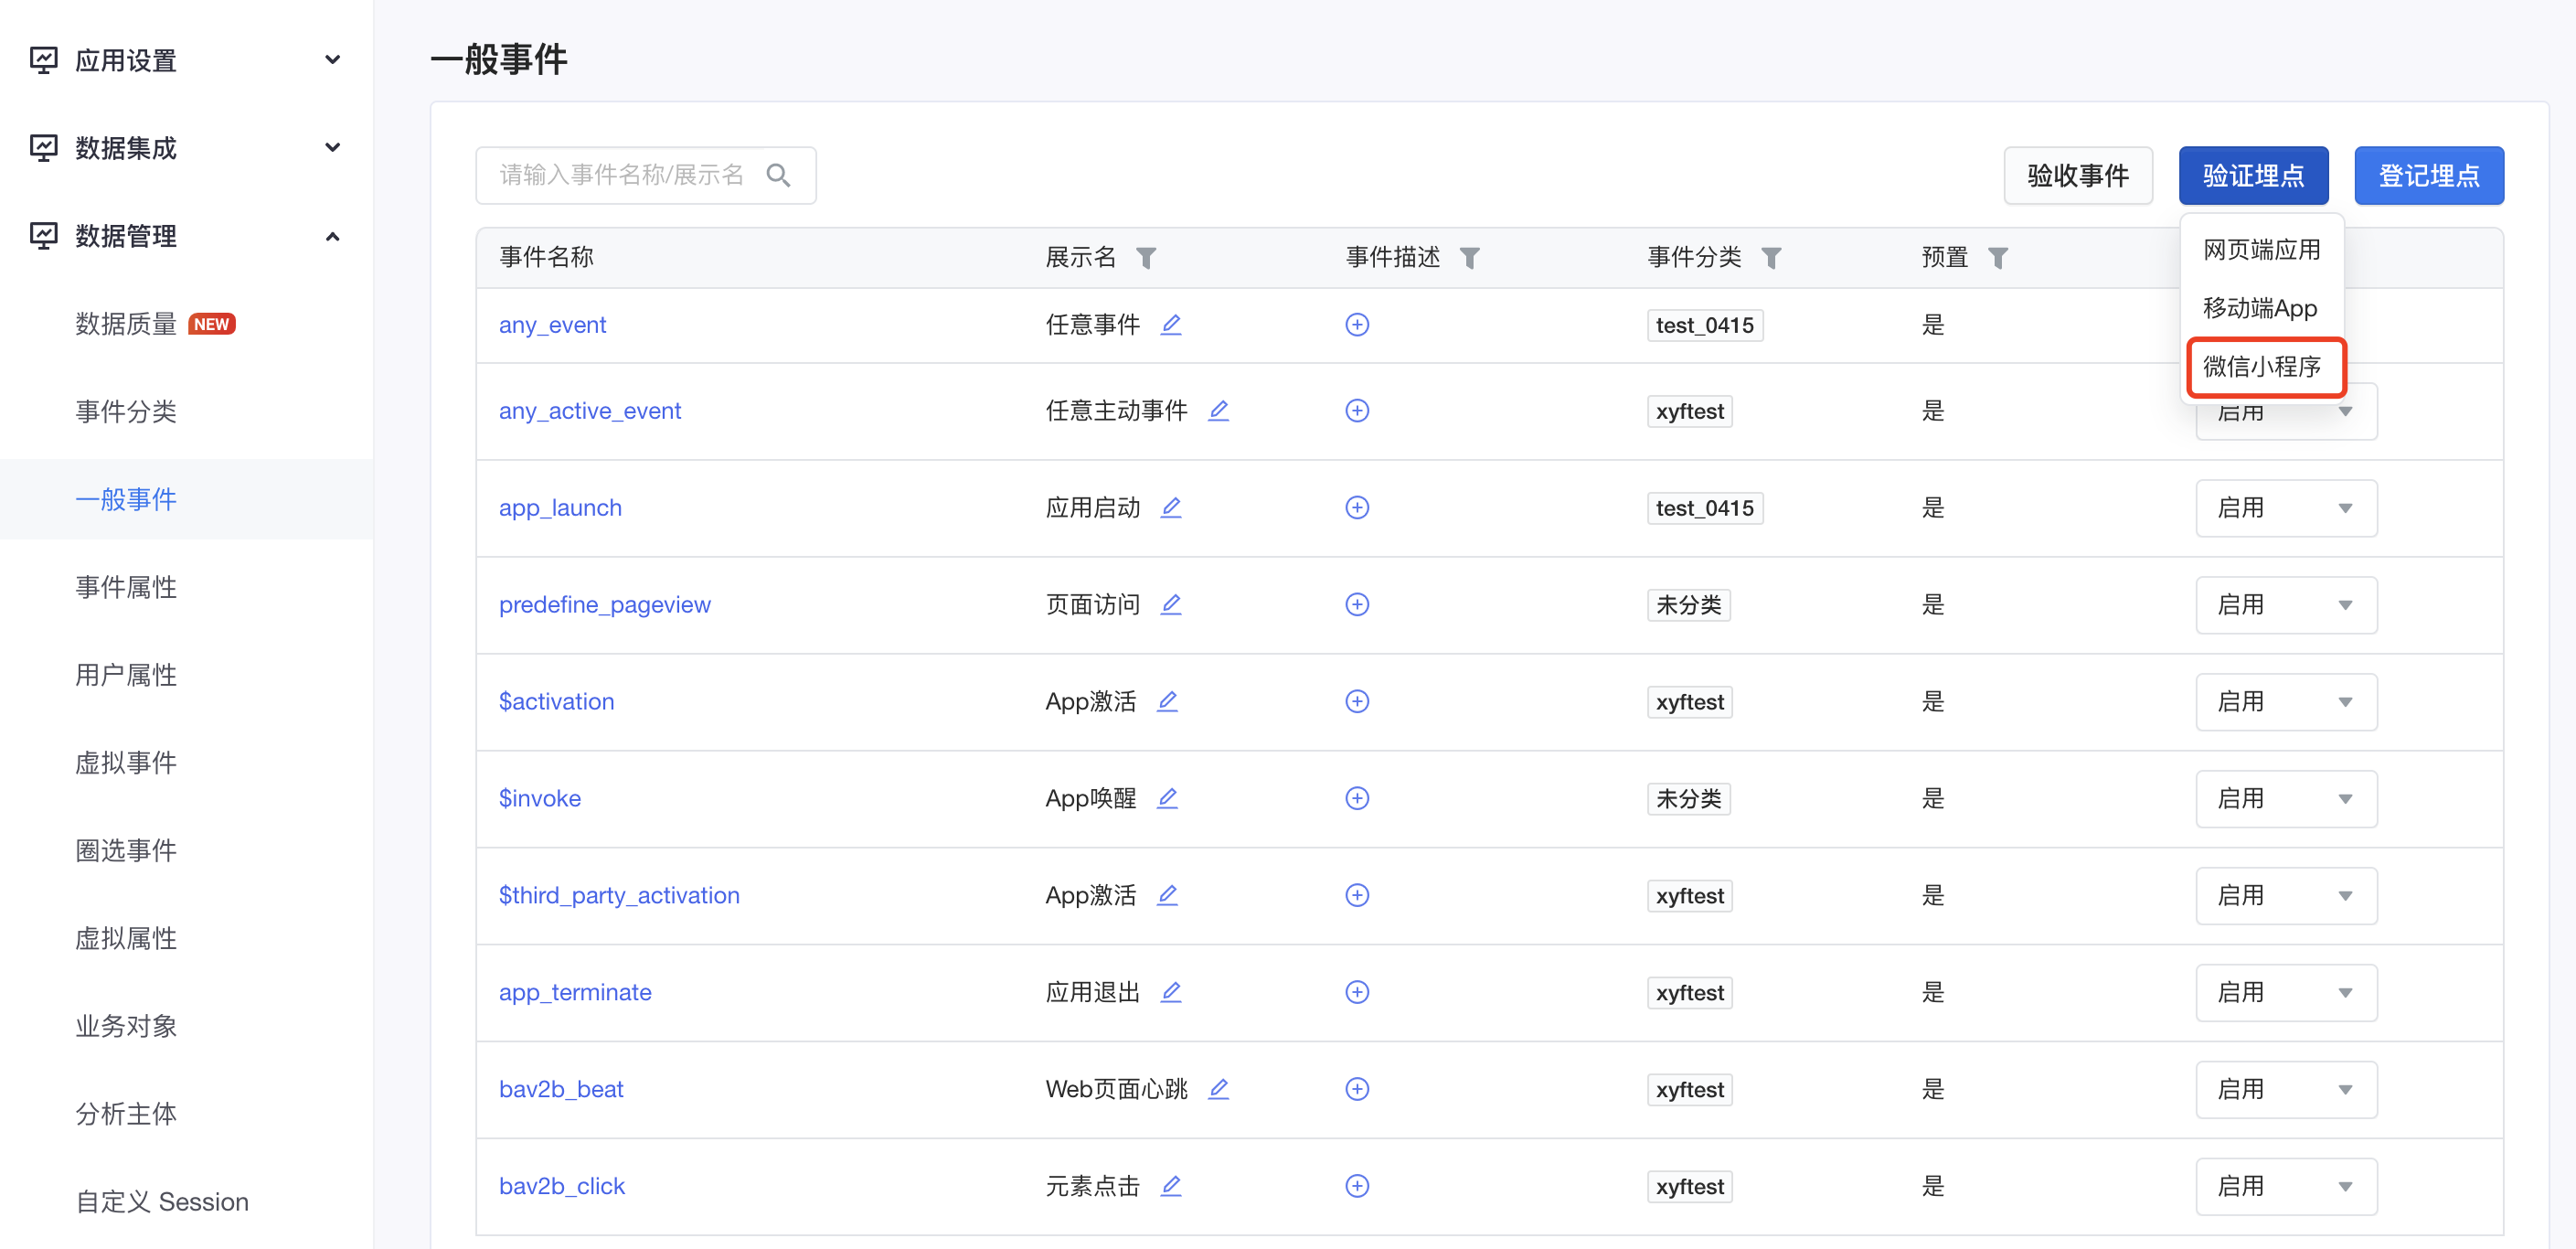
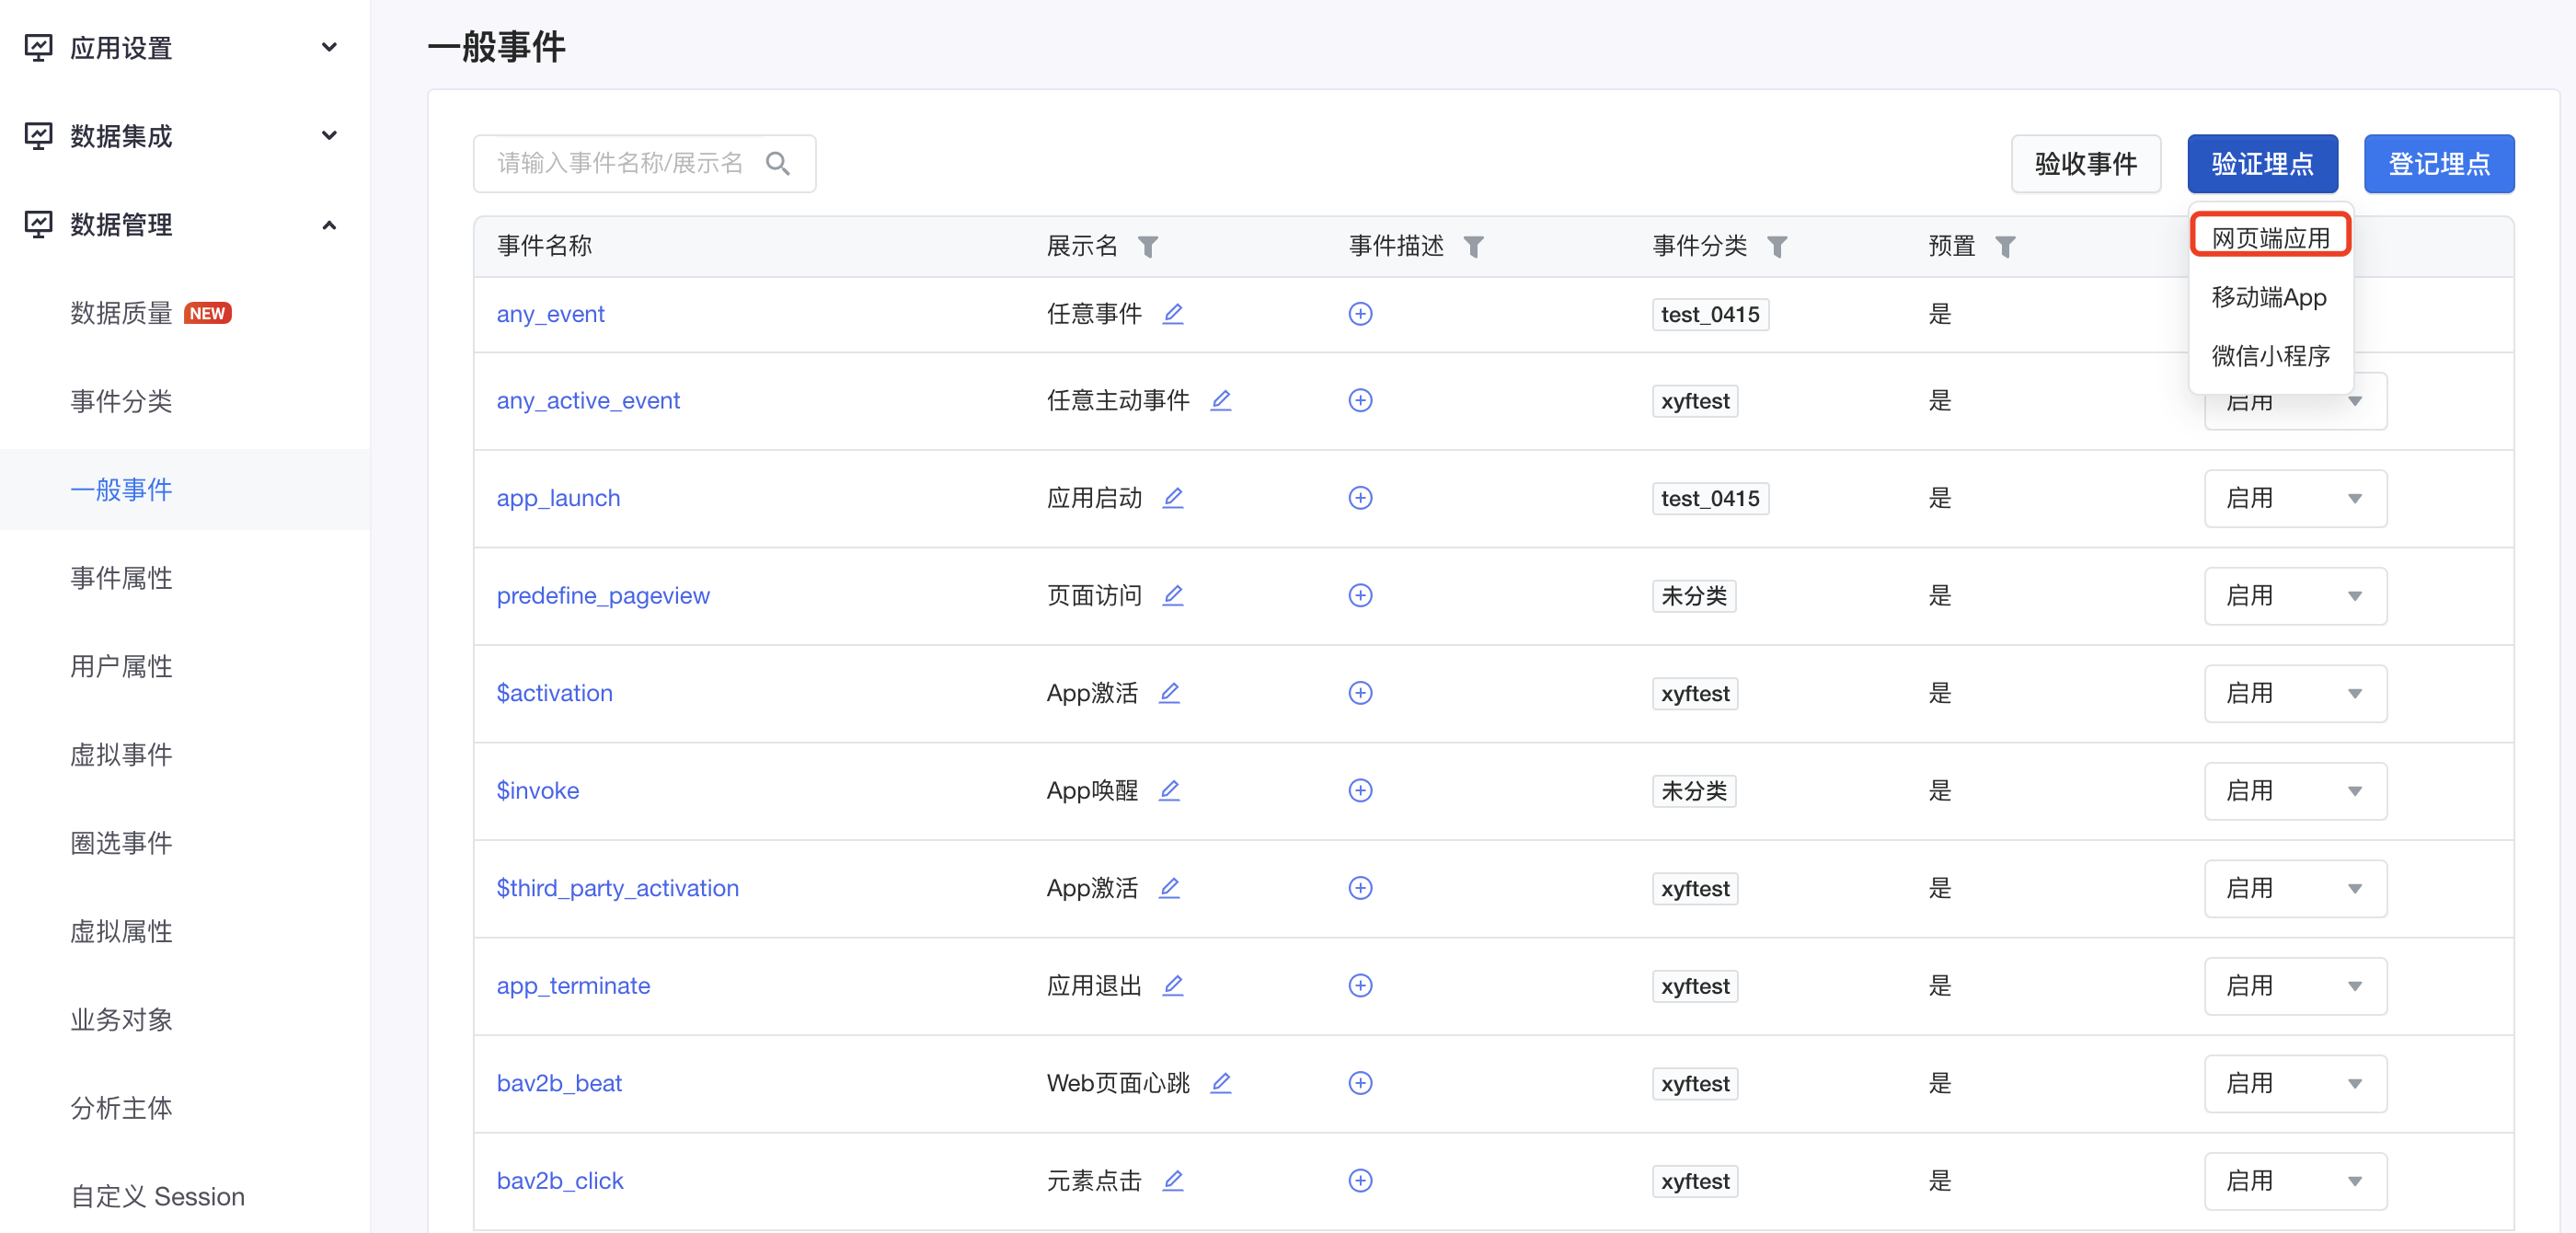
- 入口2:进入"元数据管理-一般事件"的事件管理页面,点击事件列表右上方的"验证埋点"进行埋点验证。
2.2 建立埋点实时验证连接
2.2.1 移动端App
- 点击"验证埋点",选择"移动端App"。
- 选择后,启动实时检测,建立实时验证连接。
- 第一步:扫描二维码。

注意
确保手机已安装App的正确版本(应用名称、App_name、App_id),且设置了正确的唤起Scheme,并在手机端已打开。
- 第二步:在手机浏览器中打开。
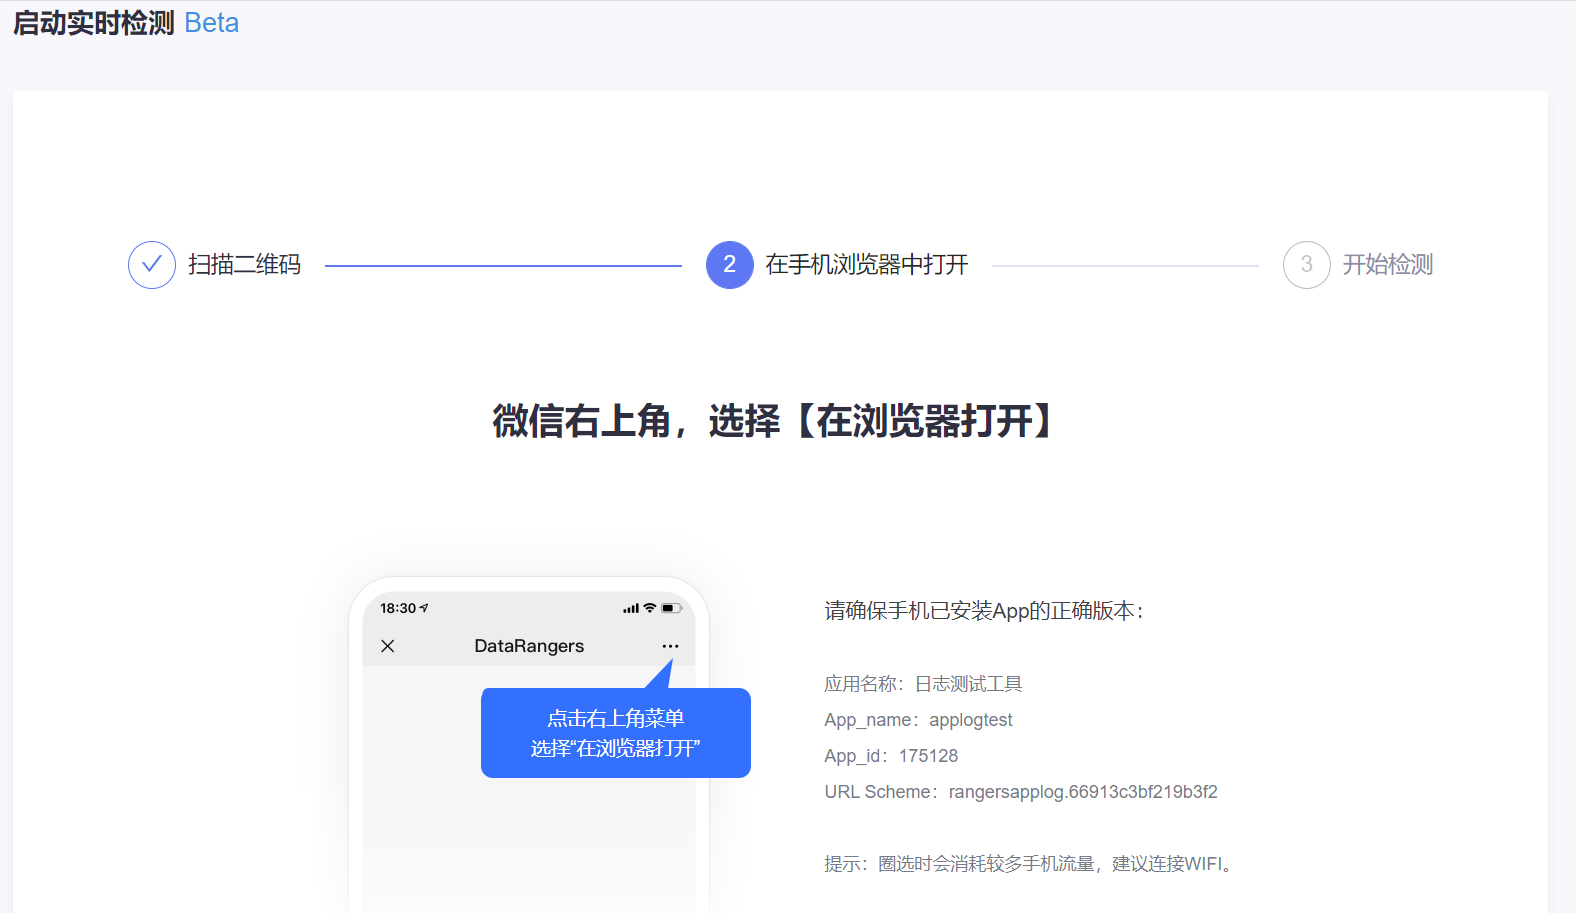
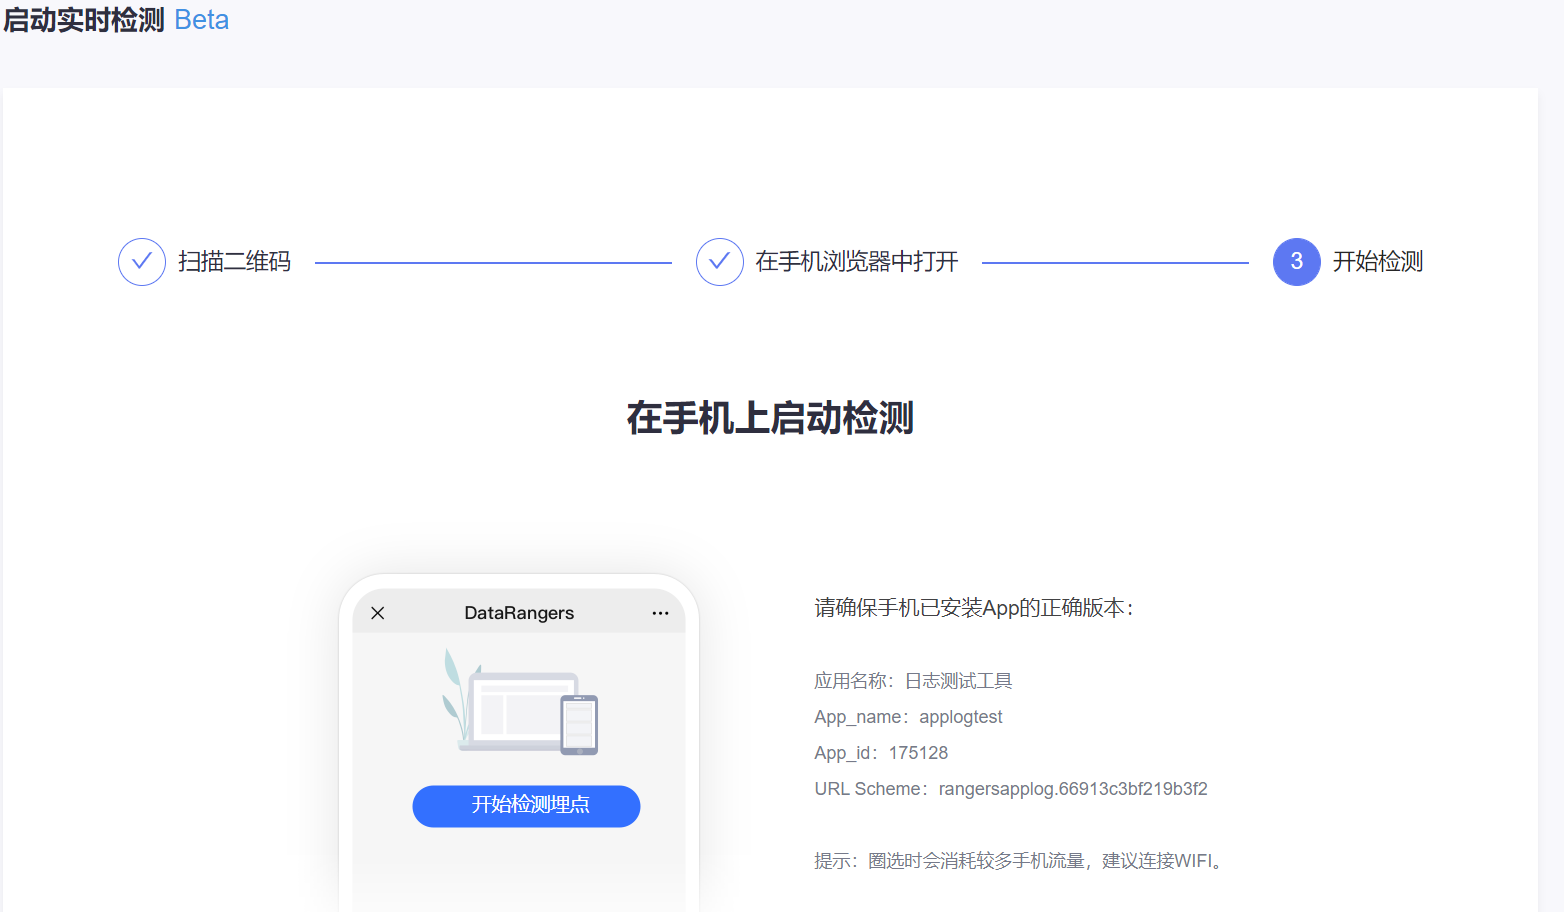
- 第三步:在手机端,点击"开始检测埋点",连接建立成功,开始检测。
- 第一步:扫描二维码。
2.2.2 微信小程序
- 点击"验证埋点",选择"微信小程序"。
- 选择后,启动实时检测,建立实时验证连接。
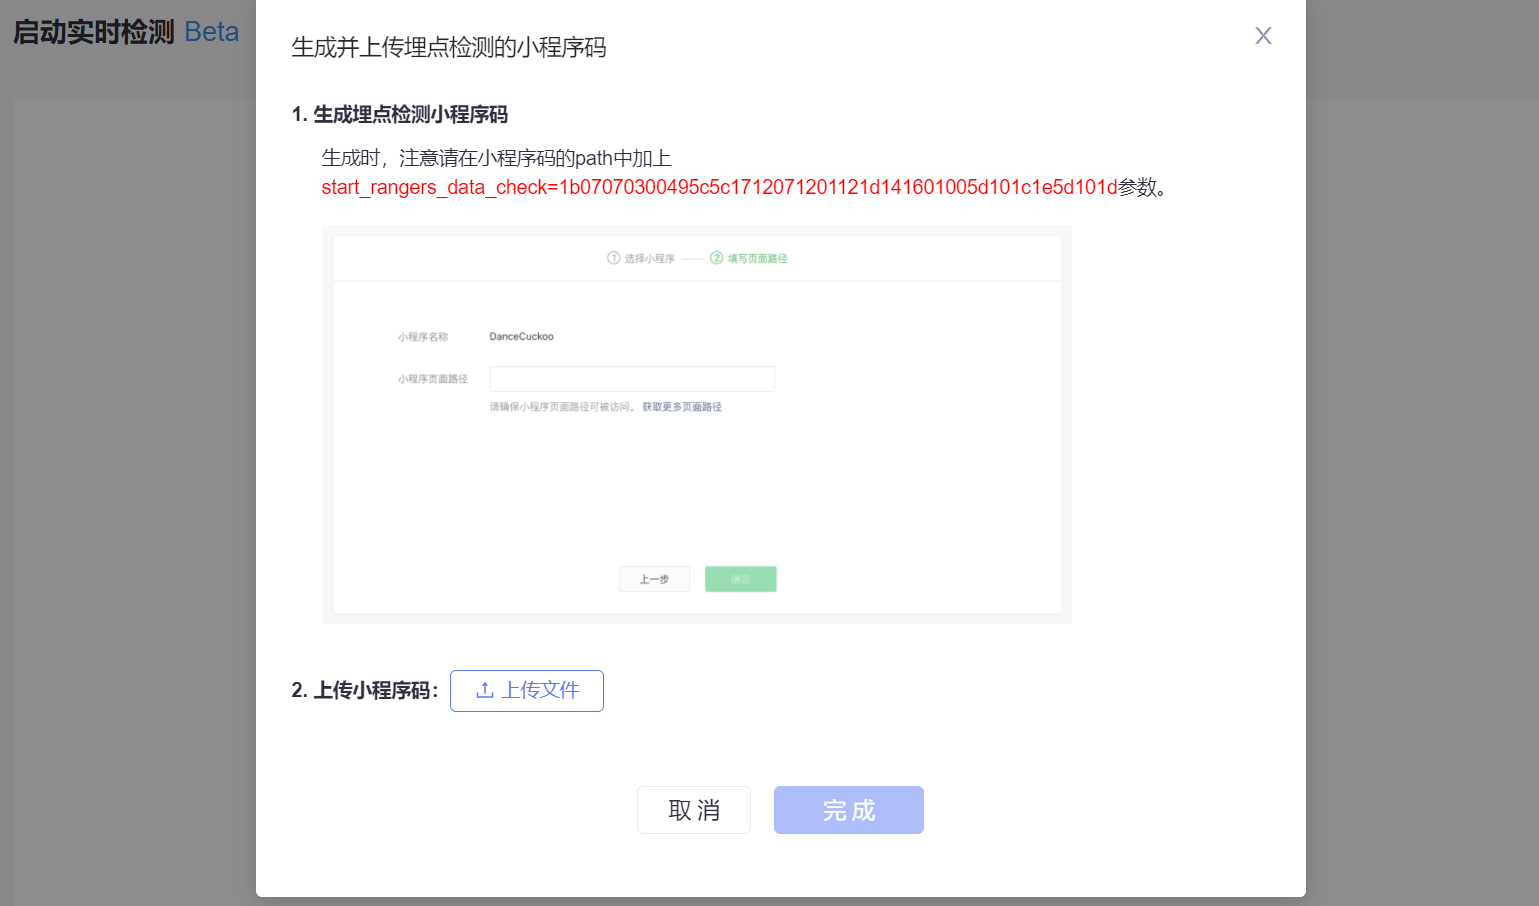
- 如果没有上传小程序二维码,则进入上传页面。
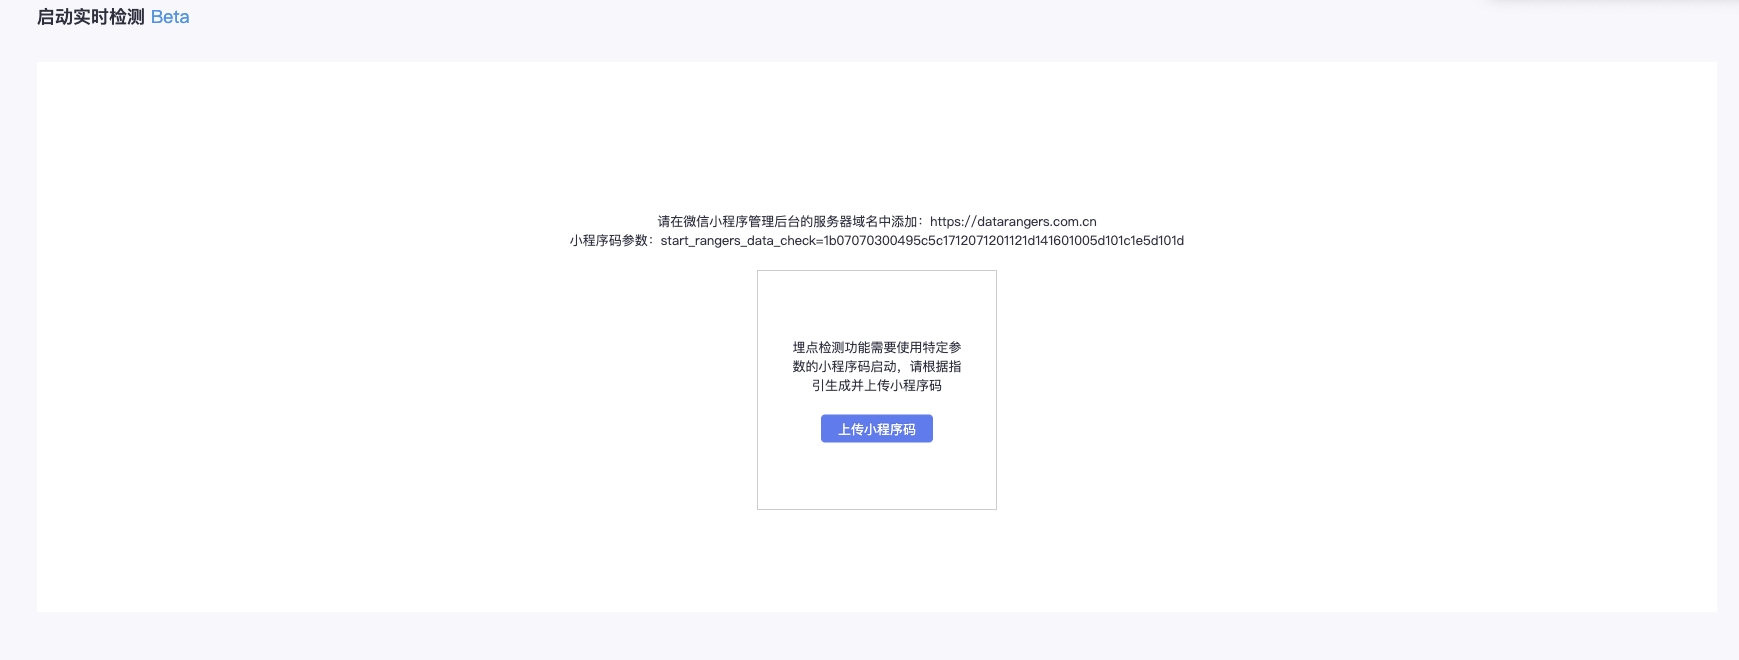
- 点击"上传小程序码"进入上传小程序码弹窗页面;根据提供的参数生成小程序码并上传,上传成功后,点击"完成",即上传小程序码完成。
- 页面展示生成上传的小程序二维码,二维码参数中带有启动埋点验证的相关参数。
- 扫描小程序码。
- 扫码进入小程序后,SDK根据埋点检测参数,启动实时检测的连接。
- 扫码成功后,自动进入埋点检测页面。

如果多个用户都扫码且没有开始检测,则根据列出扫码的用户及相关信息(按扫码时间倒序排列),可以从中选择自己的手机进行扫码,成功后自动进入埋点检测页面。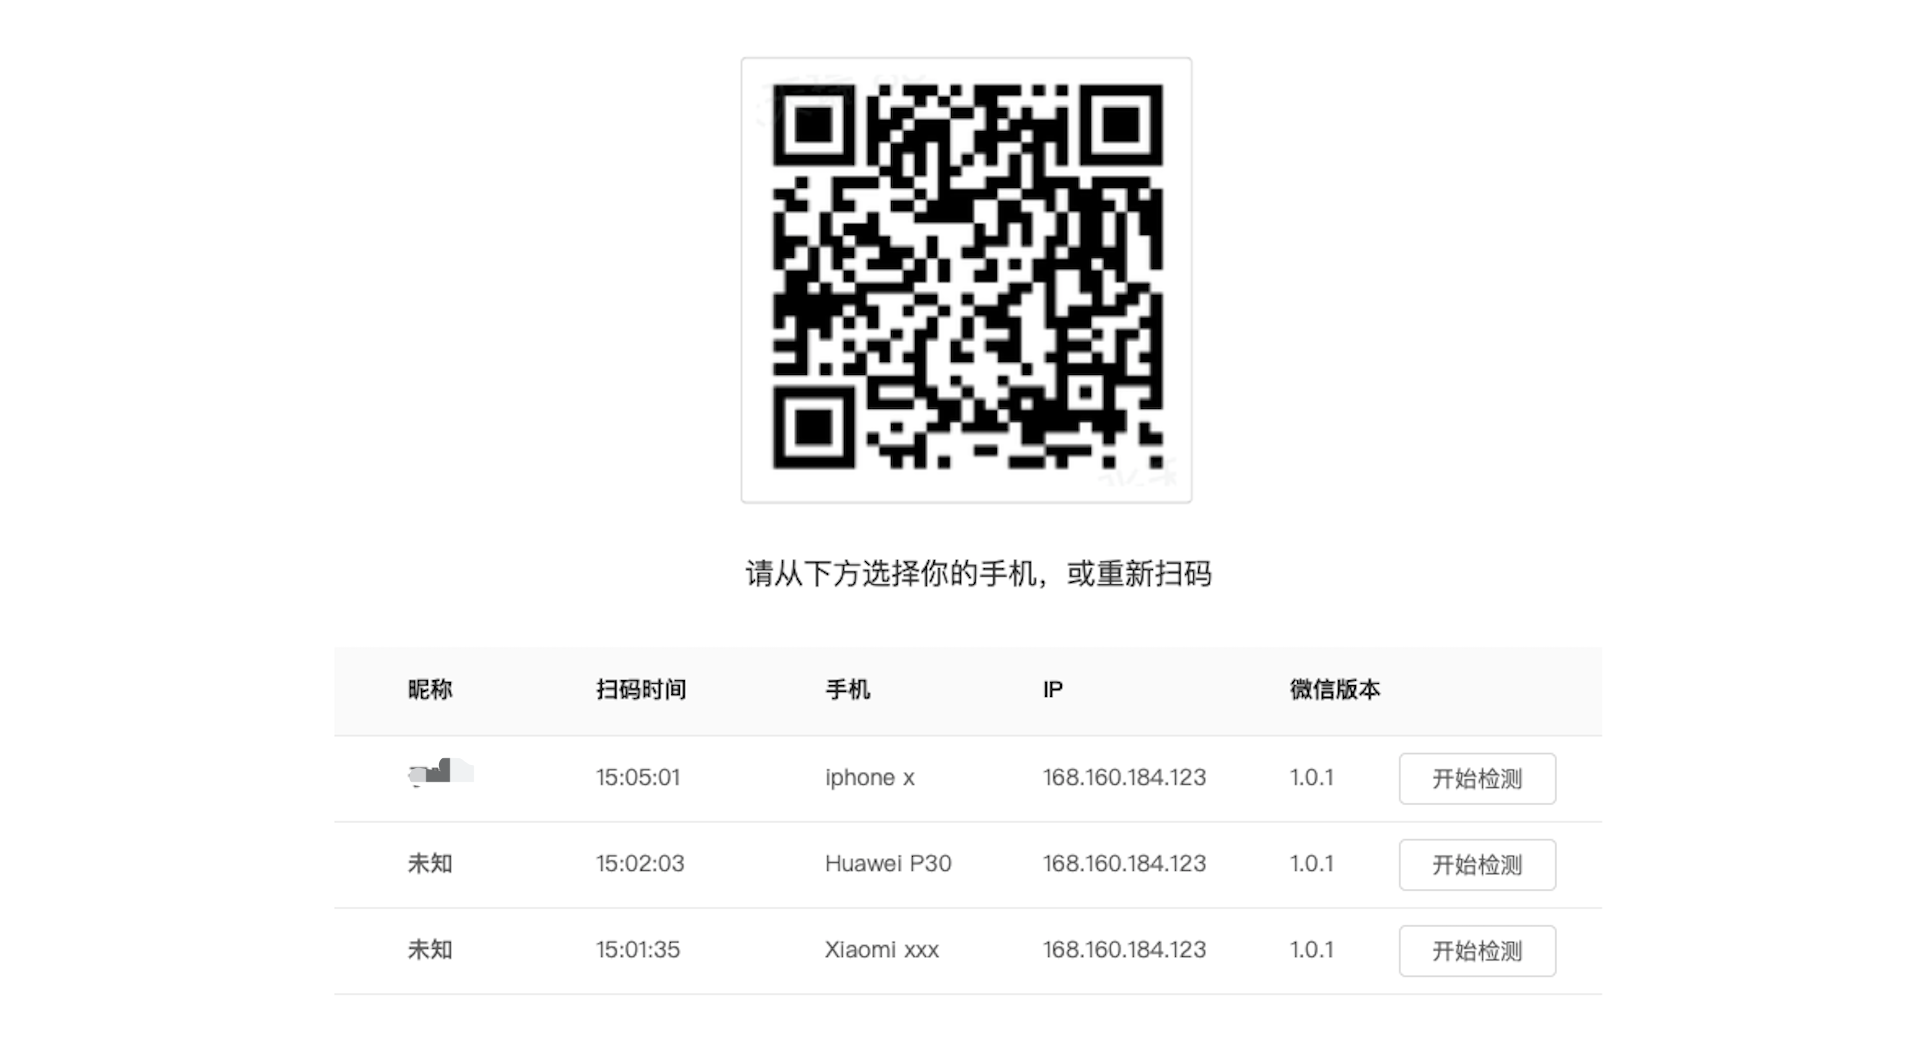
- 如果没有上传小程序二维码,则进入上传页面。
2.2.3 网页端应用
- 点击"验证埋点",选择"网页端应用"。
- 选择后,启动实时检测,建立实时验证连接。
- 输入网页端埋点检测网页地址(注:网页集成的JS SDK版本需要5.1.2及以上版本)
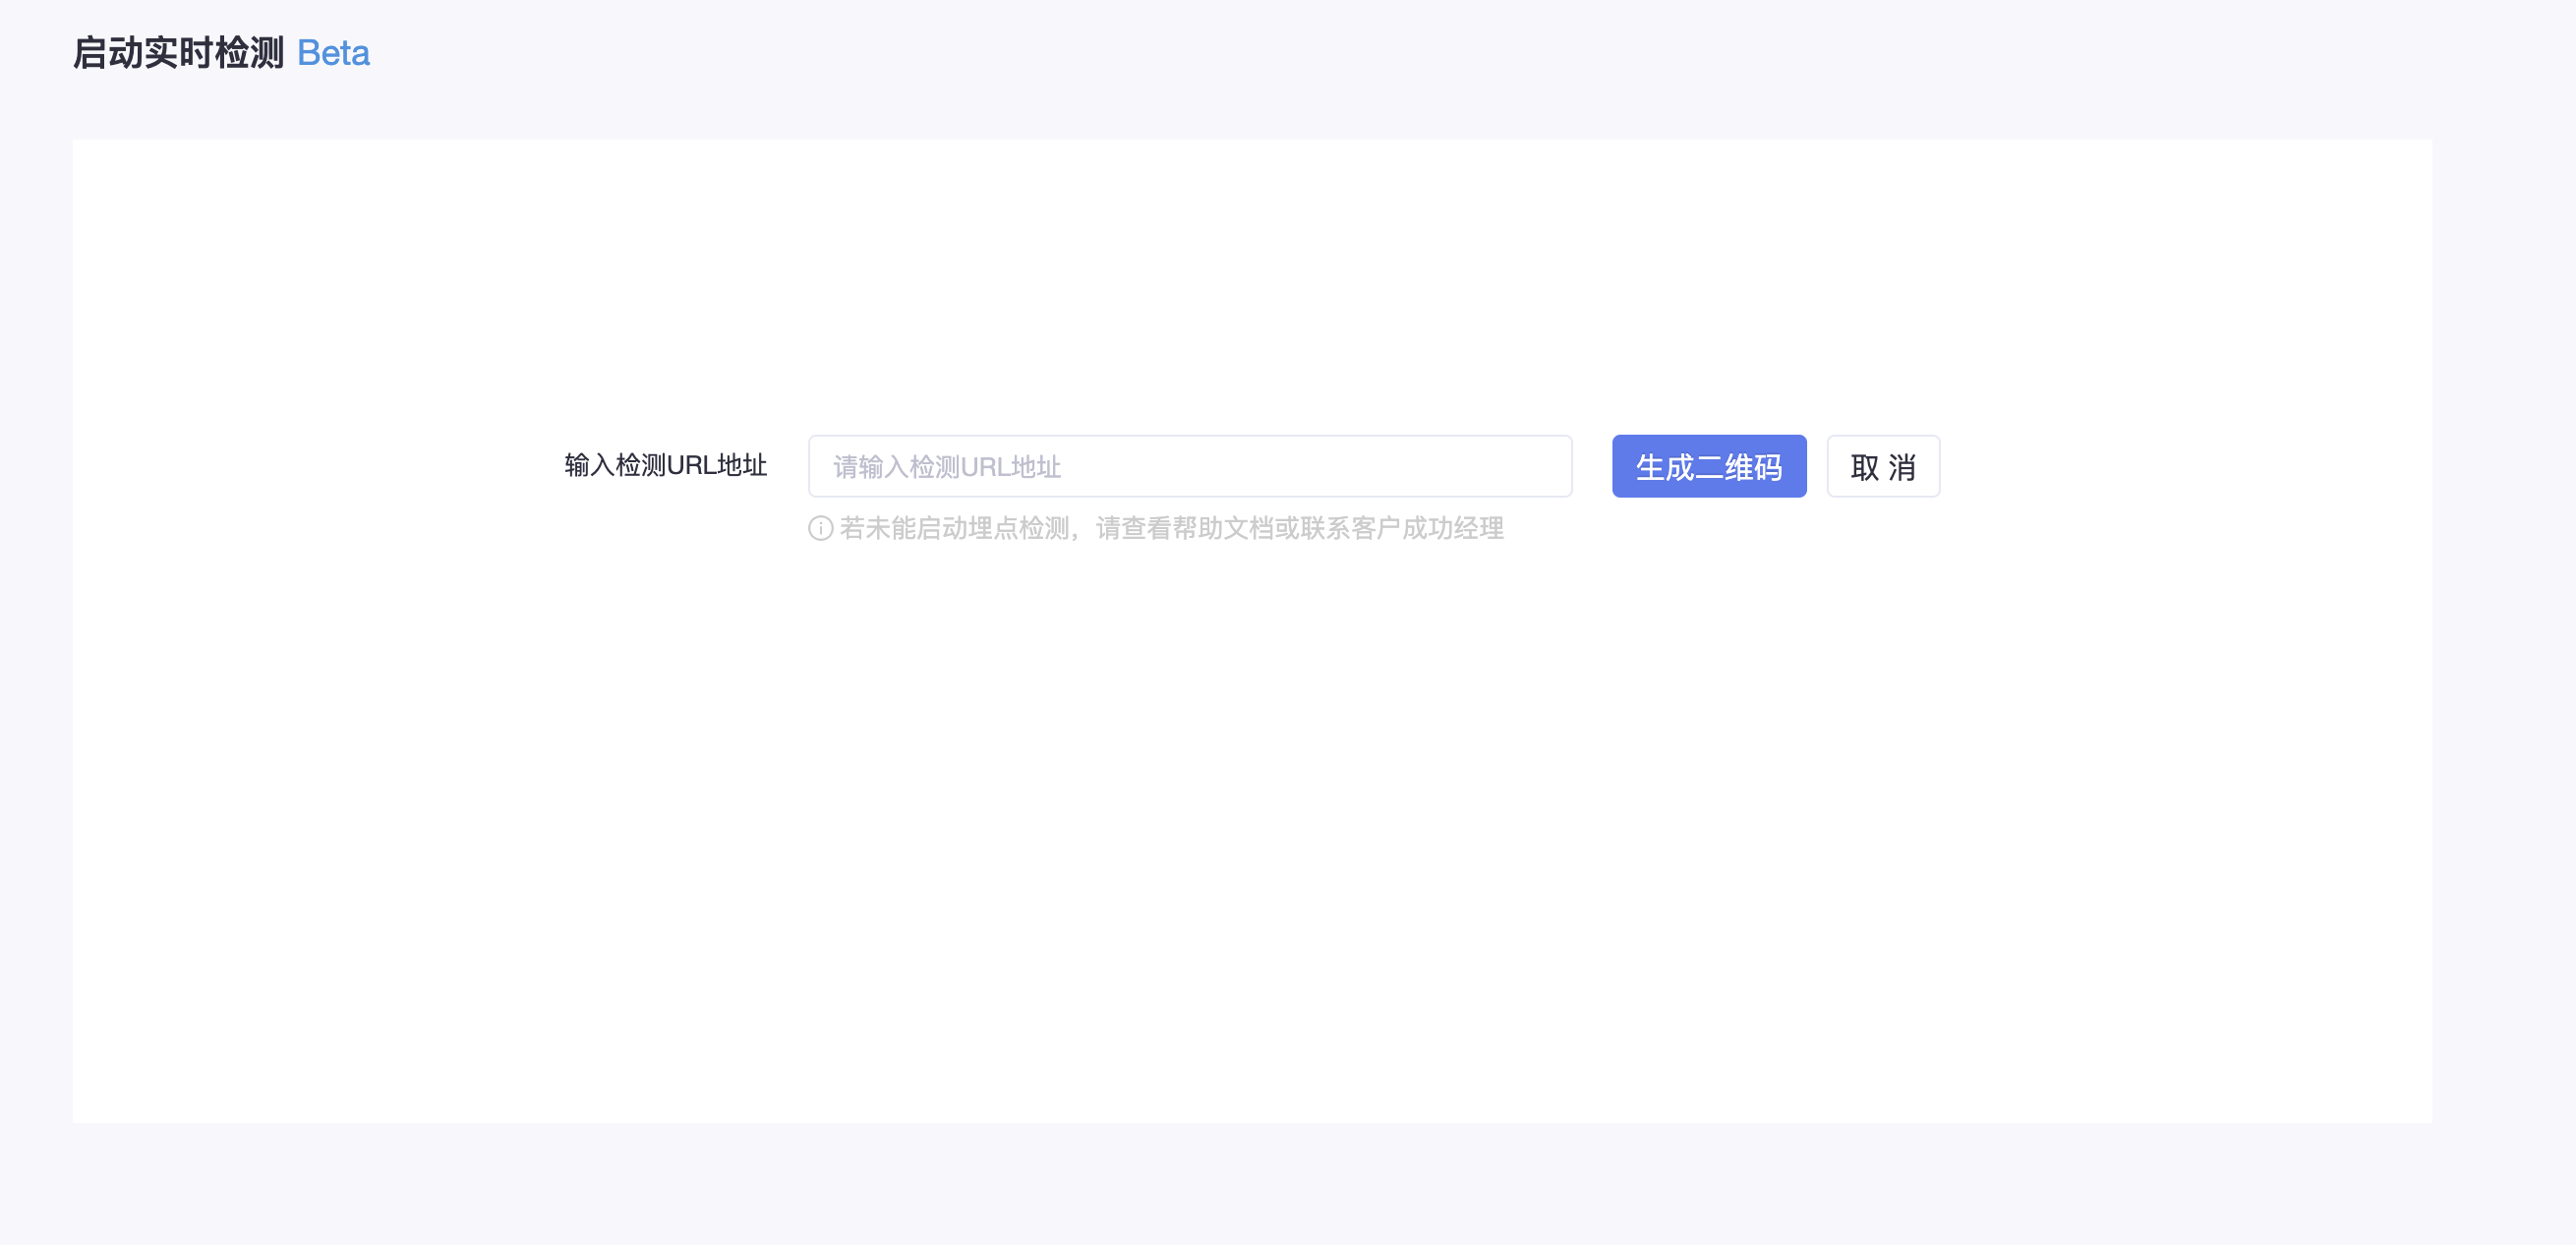
- 生成二维码及访问URL地址(注:该页面需要集成Web端的SDK)
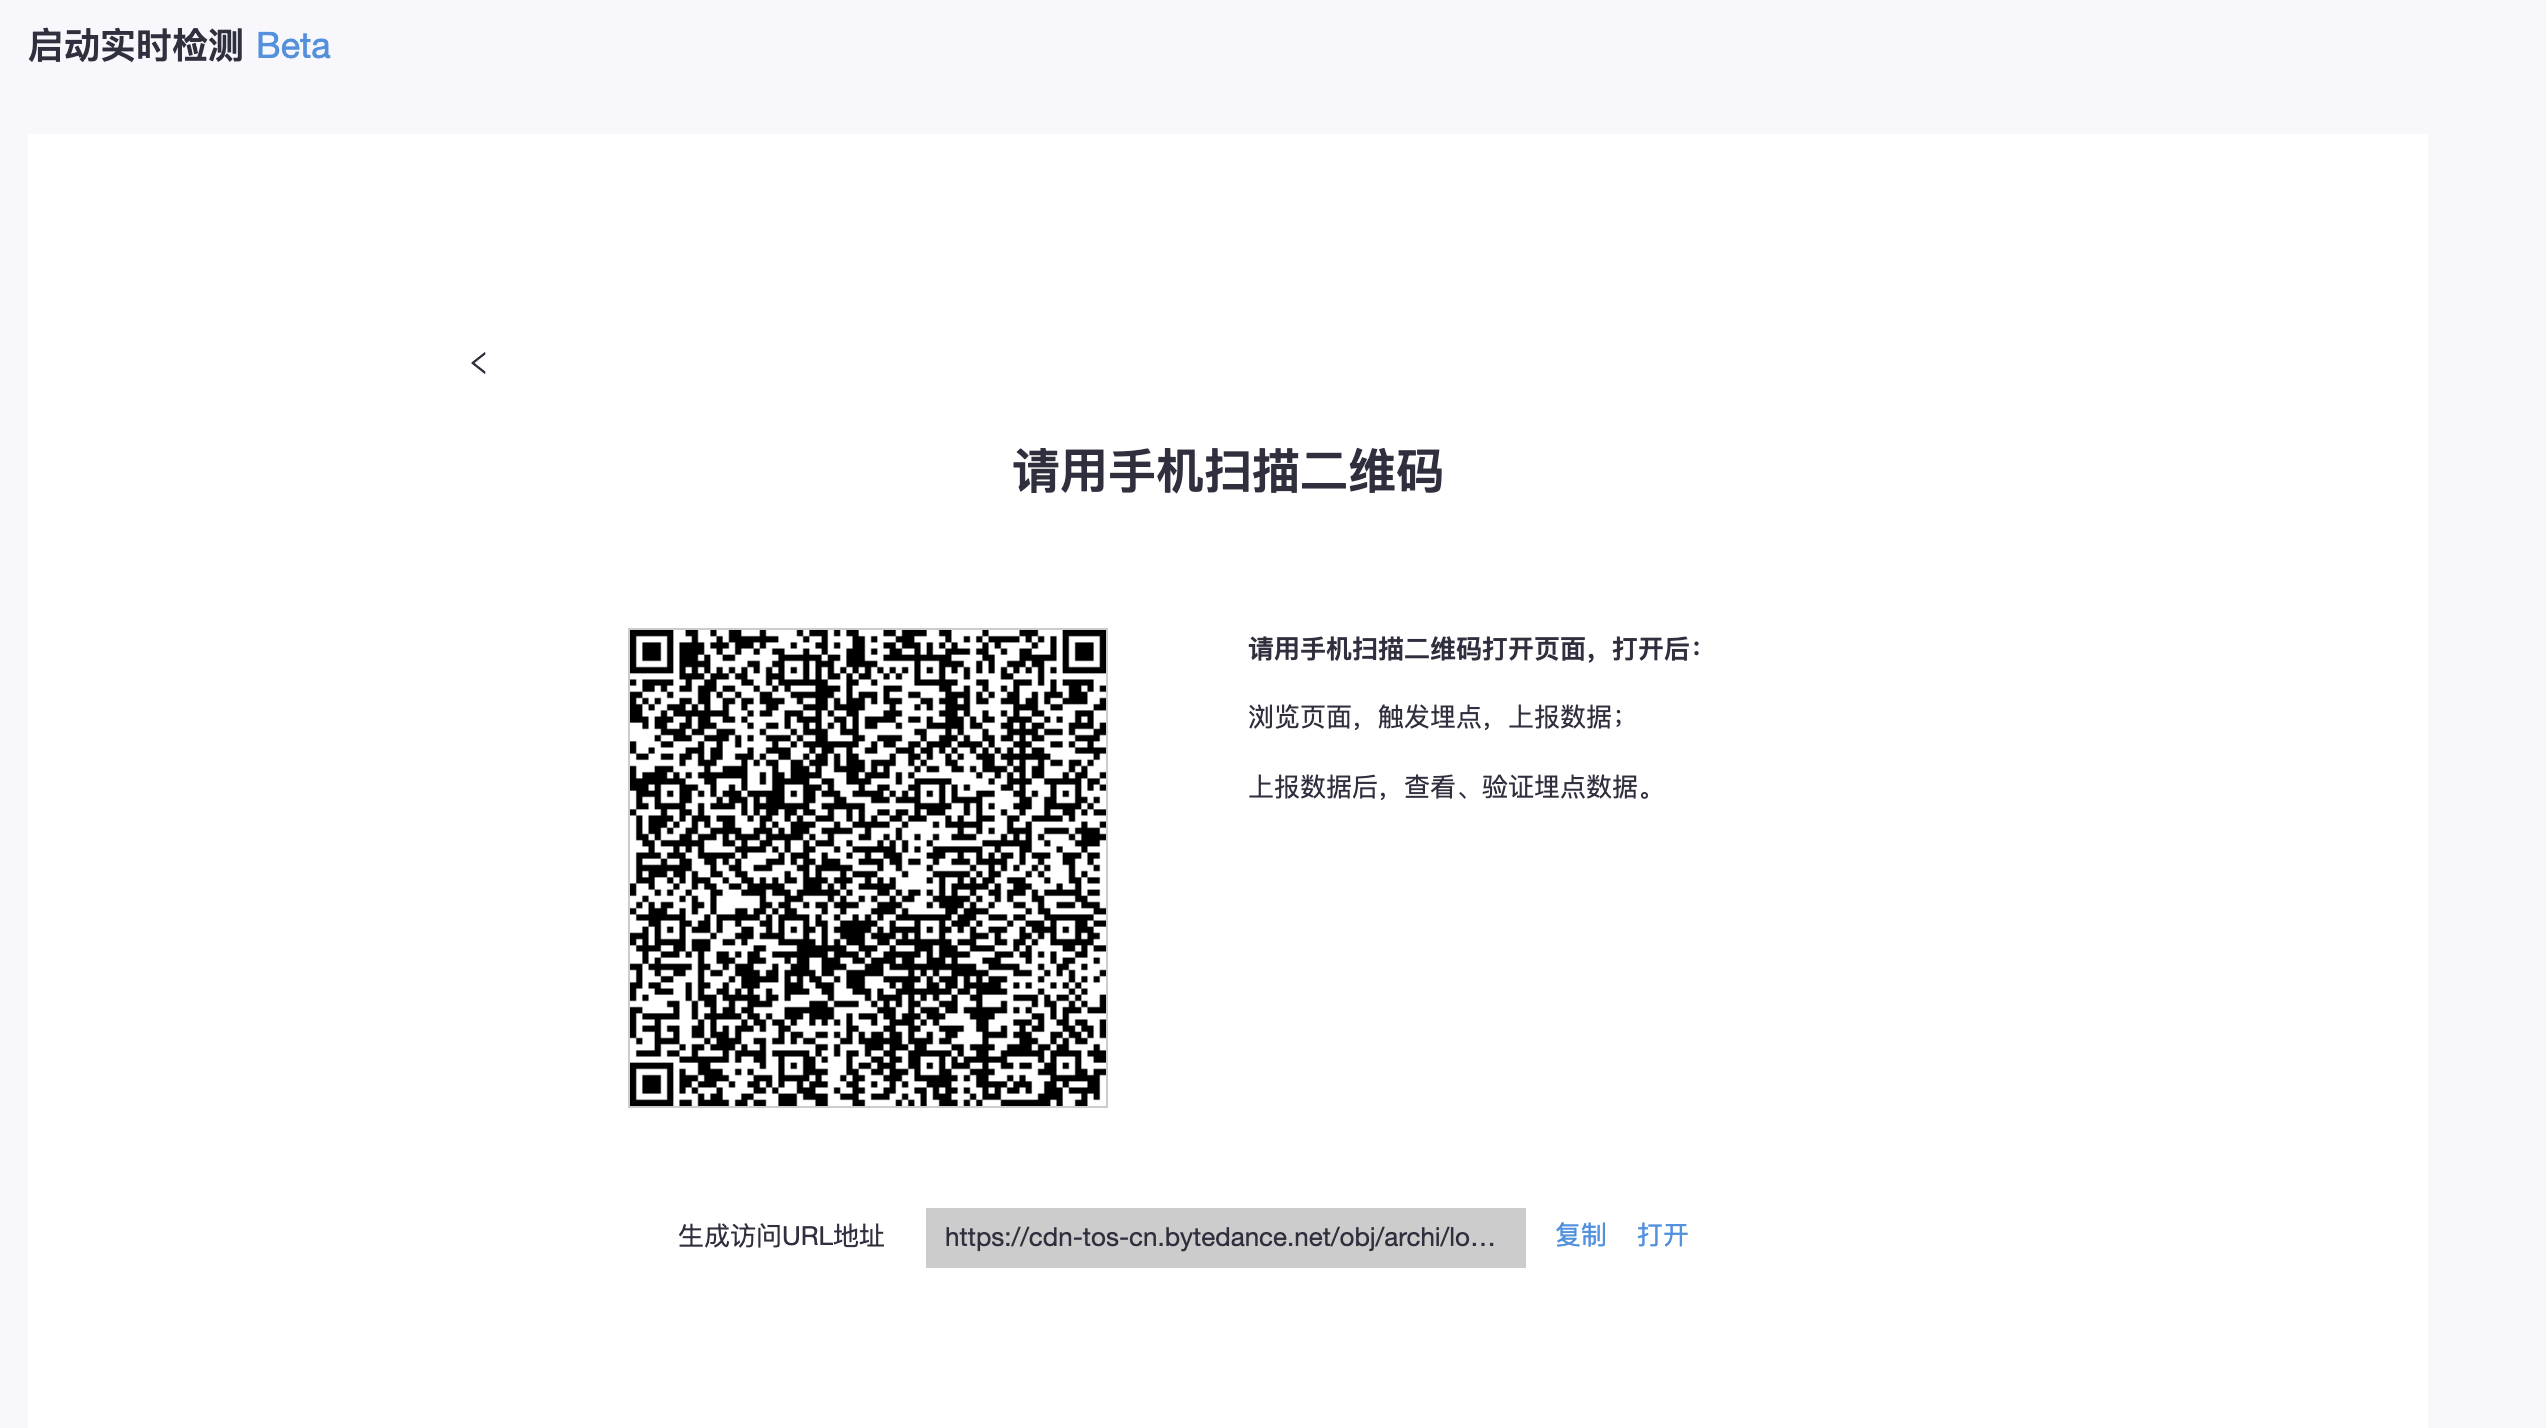
- 可通过以下方式打开页面。
- 可在手机端扫码,扫码后建立链接。
- 可根据生成的访问URL,复制后在浏览器打开访问页面,也可以直接在电脑浏览器打开。
- 输入网页端埋点检测网页地址(注:网页集成的JS SDK版本需要5.1.2及以上版本)
2.2.4 服务端埋点
- 点击"验证埋点",选择"服务端埋点"。

- 启动实时检测,建立实时验证连接。
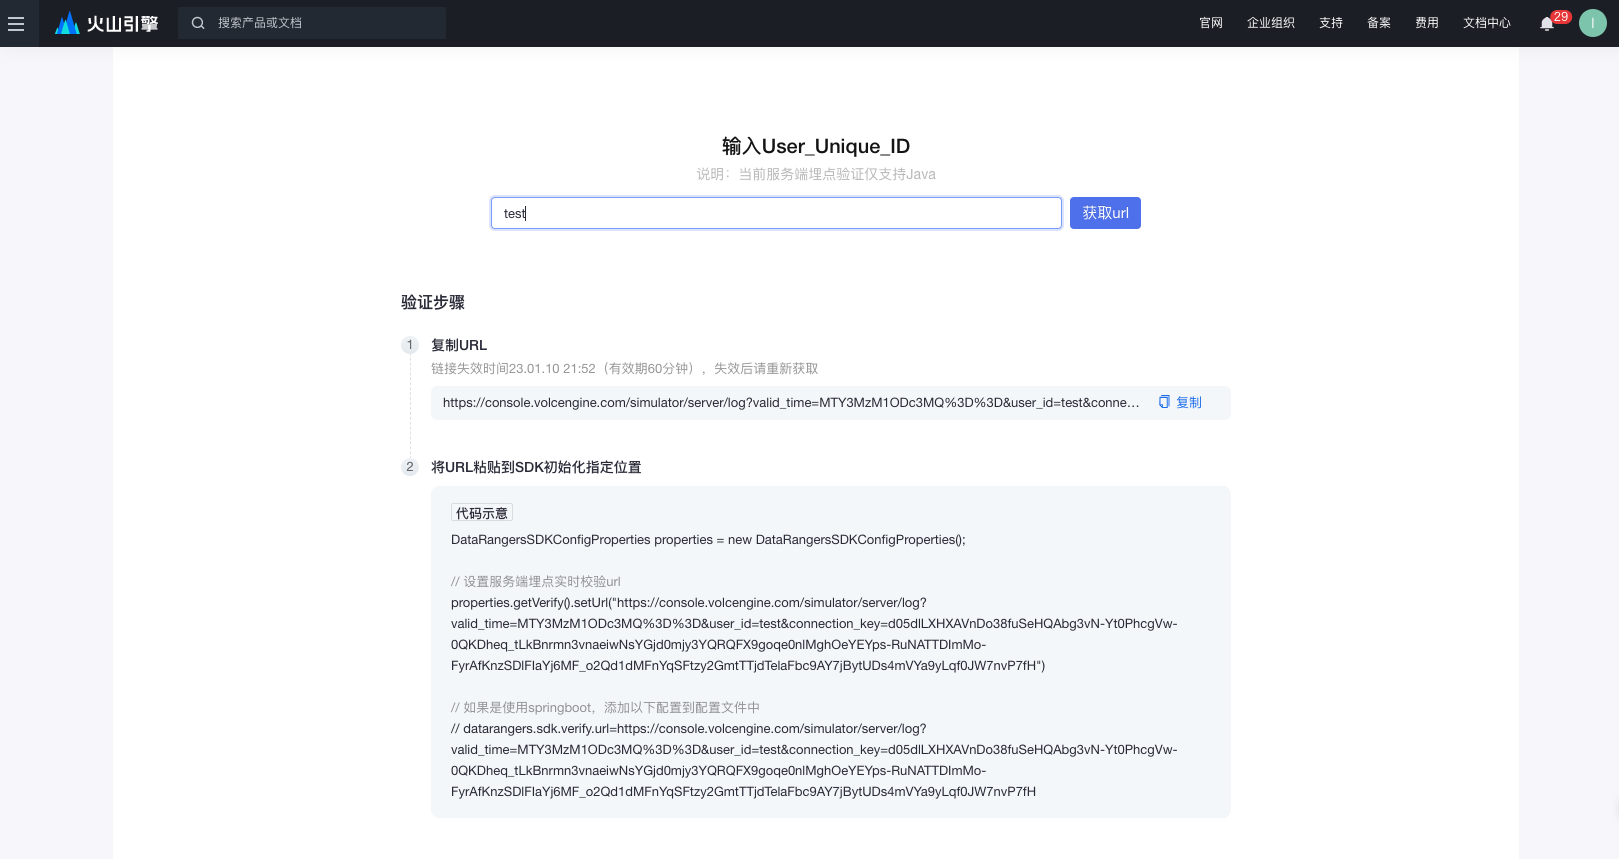
- 第一步:输入验证账号的user_unique_id。
- 第二步:获取url并根据页面提示将url设置到SDK初始化指定位置。
- 第三步:开始上报埋点并查看实时检测数据,连接建立后页面将自动跳转。
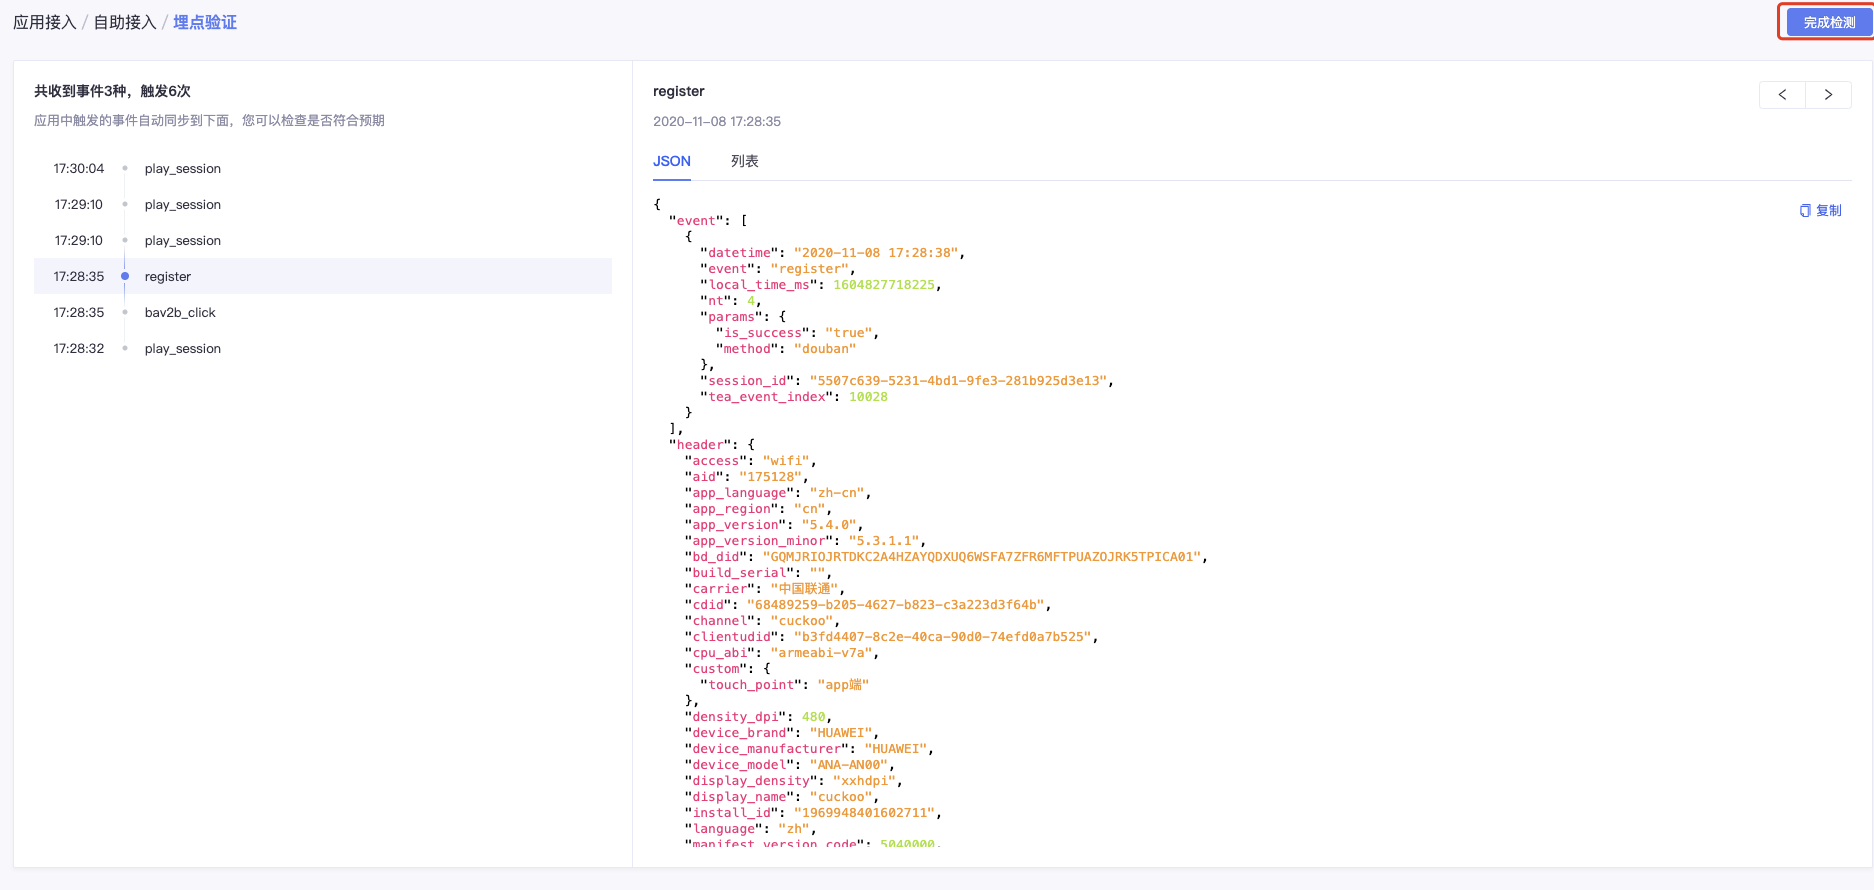
2.3 查看实时埋点检测
启动实时检测,成功建立实时验证连接后,自动进入实时验证页面,可以查看每一次的事件触发。 以移动端App为例,在手机端应用中触发上传注册事件(register)时,可进行以下操作:
- 在实时验证页面左侧的事件轴中可以看到register事件的触发;在页面右侧代码块中可以看到register事件实时上报的数据。
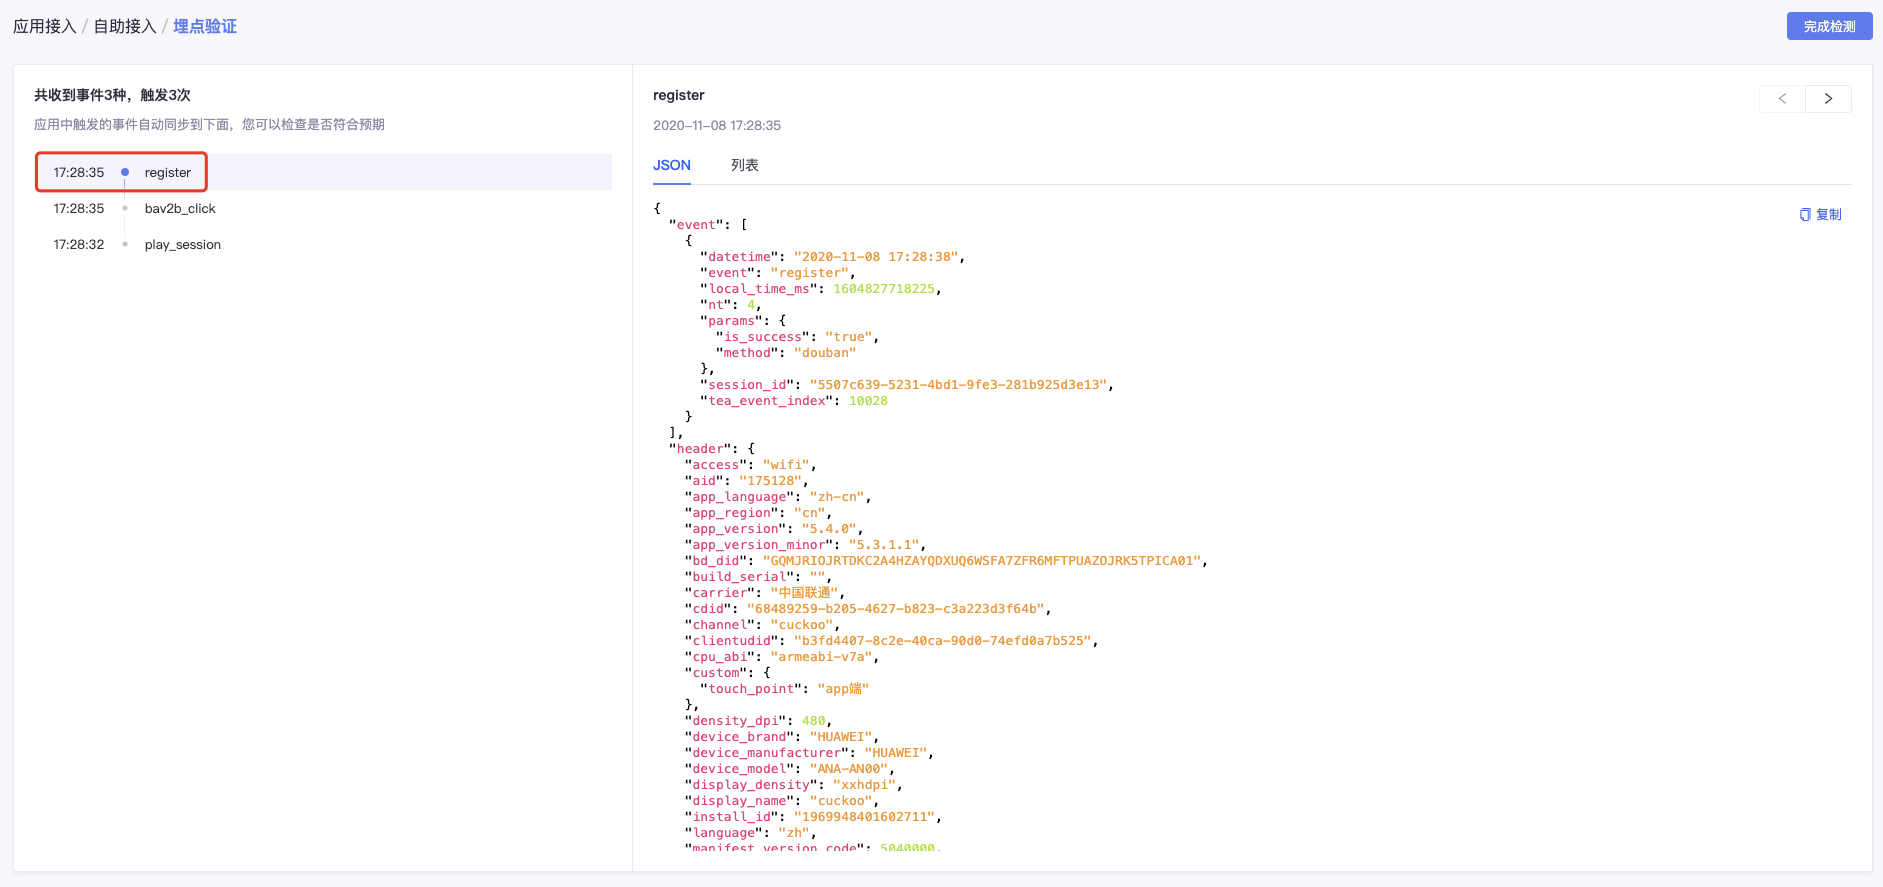
- 点击"完成检测",断开连接,并跳转到埋点管理页面。